


With an all new Start Screen, Full Screen Apps, the Windows Store, cloud synch options, improved task manager and built-in antivirus with Windows Defender, Windows 8 is just the kind of Operating System we all wanted. It’s the next generation operating system, which appears to have been customized for the mobile age. Since Android and iOS are here and become popular already, it was but natural for Microsoft to come up with something exciting and current. If you want to understand how to install Windows 8, you’ve just landed on the right page. Here, we’ve got a step by step guide on Windows 8 OS installation ready for you!
Follow this complete guide for successful Windows 8 Installation:
Step 1: To get started with Windows 8 installation, make sure that CD/DVD-ROM Drive is your BIOS boot priority.
[Read: How to Change Boot Device Priority through BIOS Settings]
Step 2: Now, insert your Windows 8 DVD into the CD/DVD-ROM. Restart the system.
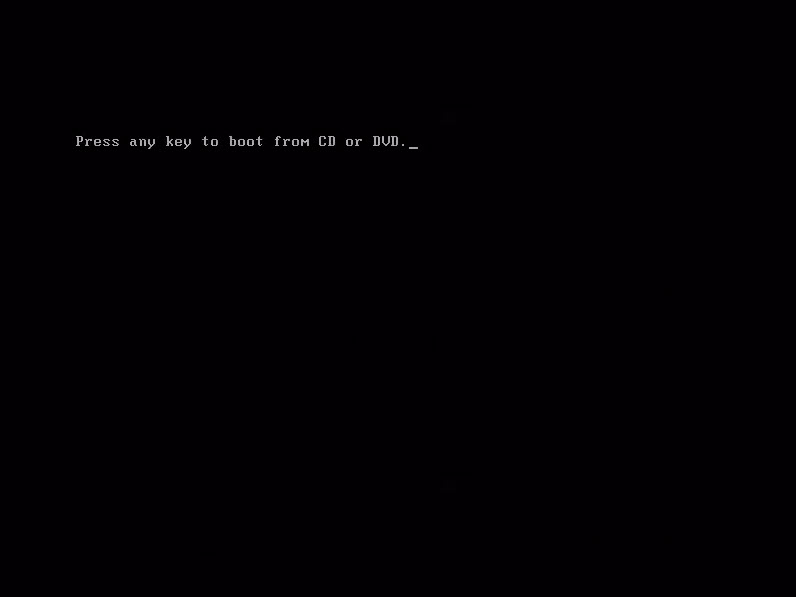
Step 3: As soon as you restart your system, the following message, “Press any key to boot from CD or DVD…” will appear. Press any random key to boot from Windows 8 CD or DVD. (Check the screenshot below)
Step 4: Now, the Windows Operating System will start loading files. (Check the screenshot below)
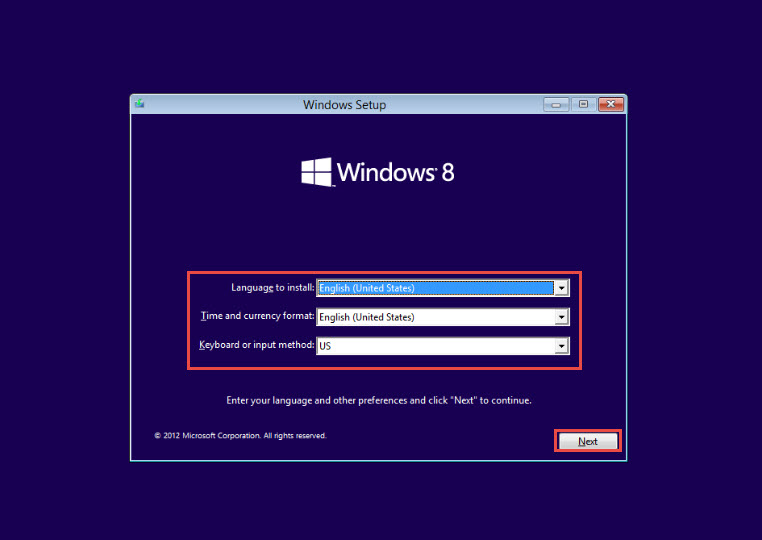
Step 5: Once the files are loaded, a dialogue box will appear in front of you. Here, you are required to make the following selections:
- Language to install
- Time and Currency Format
- Keyboard and Input Method
Step 6: As soon as you are done entering the required information, click on the “Next” button located at the end. (Check the screenshot below)
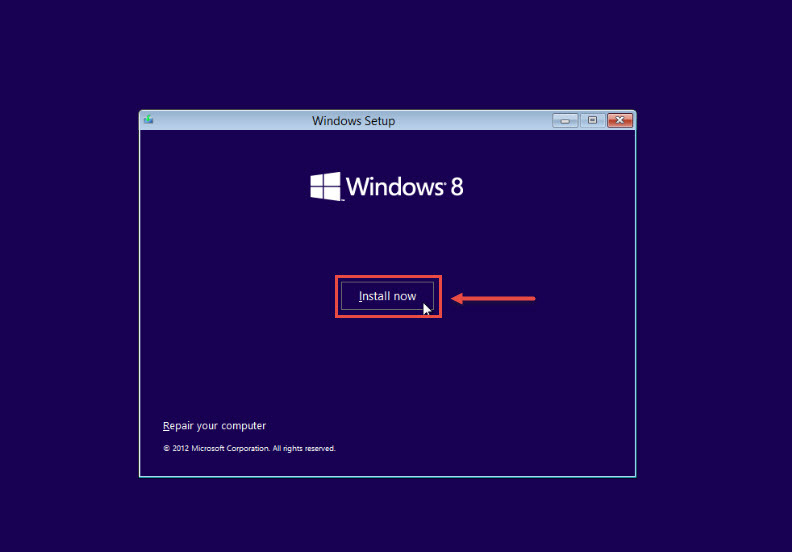
Step 7: Windows is now all prepared for installation. Click on “Install Now” to proceed. (Check the screenshot below)
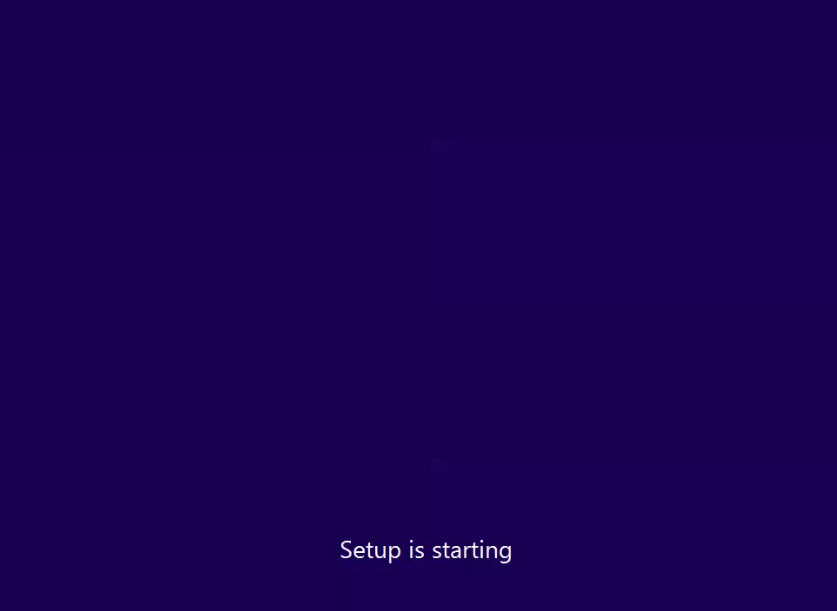
Step 8: The new screen will display the message “Setup is starting.” Wait patiently as this step may take few minutes to complete. (Check the screenshot below)
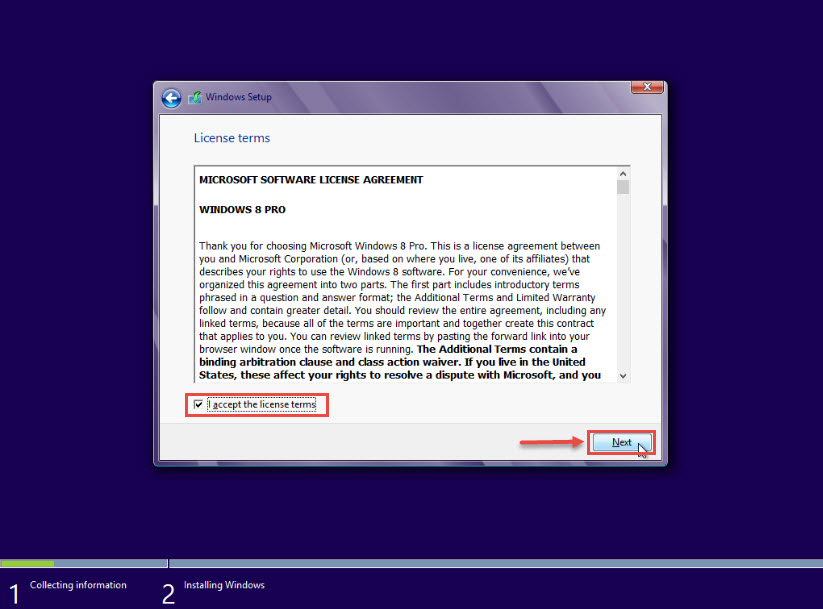
Step 9: As soon as the setup is initiated, another dialogue box appears on the screen. You are required to check on the checkbox right next to the “I accept the license terms” and click “Next”. (Check the screenshot below)
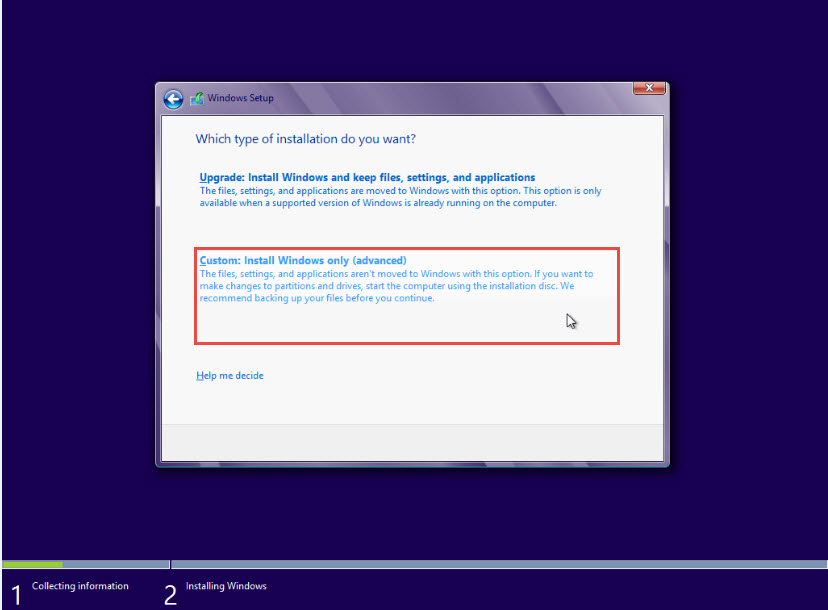
Step 10: The next dialogue box will feature the query “Which Type of Installation Do You Want?” Click on “Custom: Install Windows only (advanced)”. (Check the screenshot below)
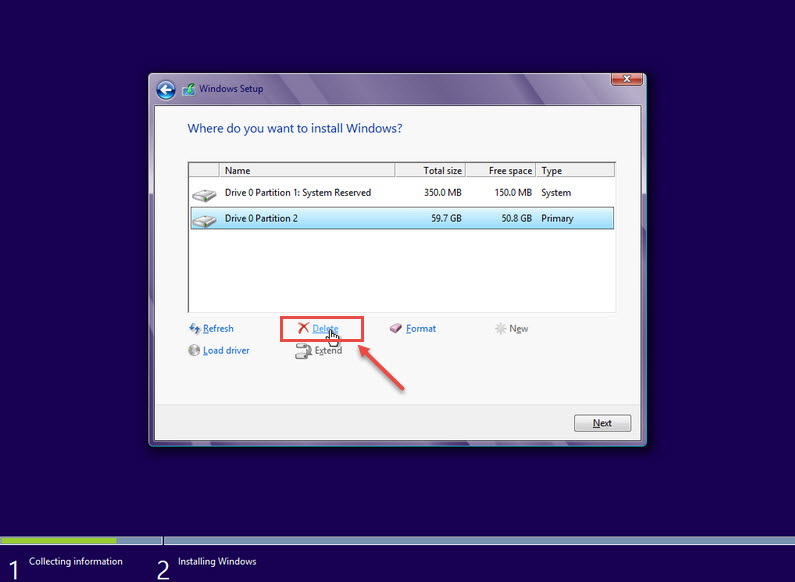
Step 11: The next screen will display the various Hard Disk partitions. To continue with the installation, you need to click on “Drive Options (advanced)” at the right-end of the box. (Check the screenshot below)

Important Note: In case your Hard Drive comprises of some data and is not new, remember to SKIP the following 3 steps while installing Windows 8 on a computer:
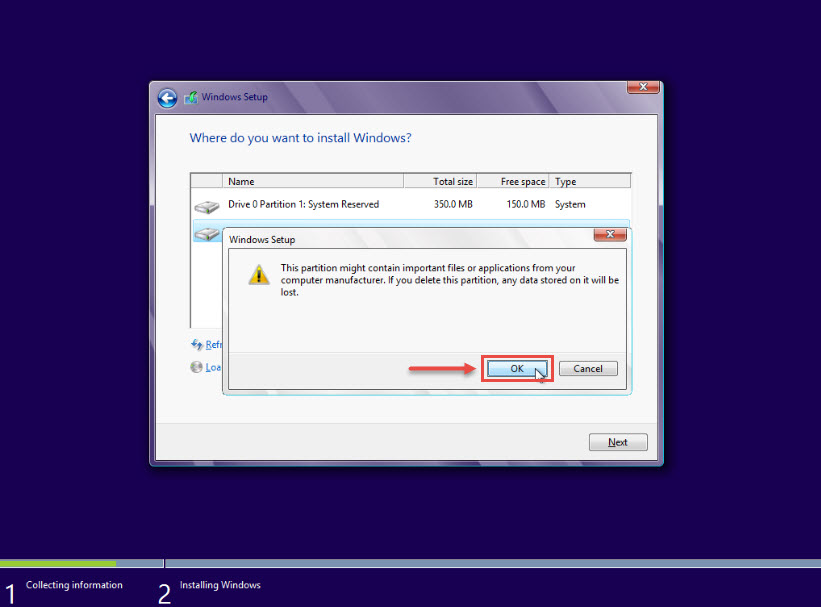
Step 12: When the next dialogue box appears on the screen, click on every drive individually and click on “Delete” tab to delete all the available drives. (Check the screenshots below)
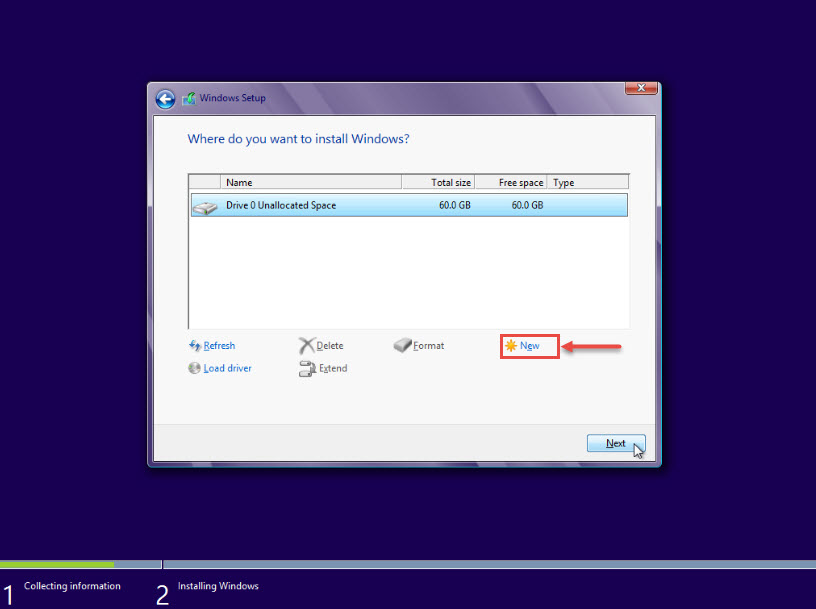
Step 13: When you are done deleting the existing partitions, click on the “New” tab in order to create new partitions. (Check the screenshot below)
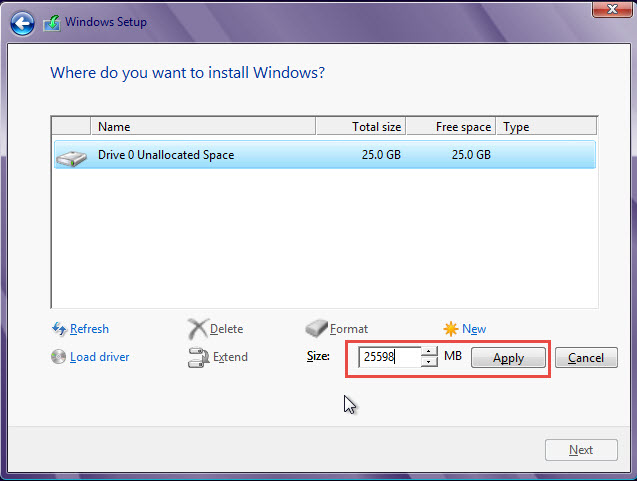
Step 14: While creating new partitions, you need to select the preferred size for each drive from the size tab. You have to click on the “Apply” button to save settings for each one of the drives as you make changes. (Check the screenshot below)
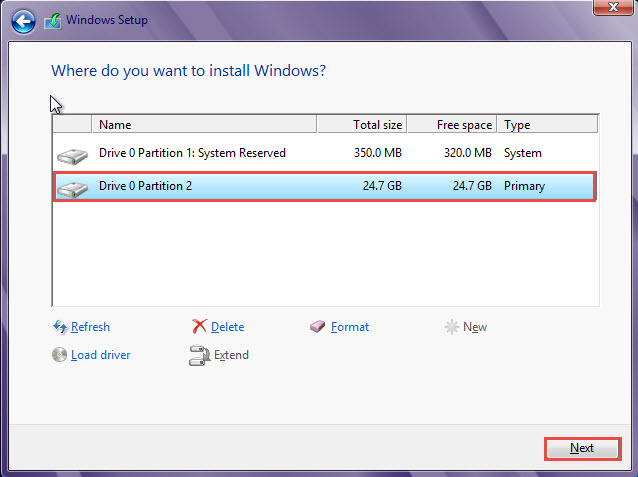
Step 15: After you’ve created the partitions, you need to select the partition in which you wish to install Windows 8 Operating System. Now, click “Next”.
Step 16: As the Windows 8 installation process proceeds, a hard disk partition is selected for Windows 8 Installation. After selecting the target partition, you just need to click on the “Next” button to move ahead. (Check the screenshot below)
Step 17: The next step will involve installation of Operating System. (Check the screenshot below)
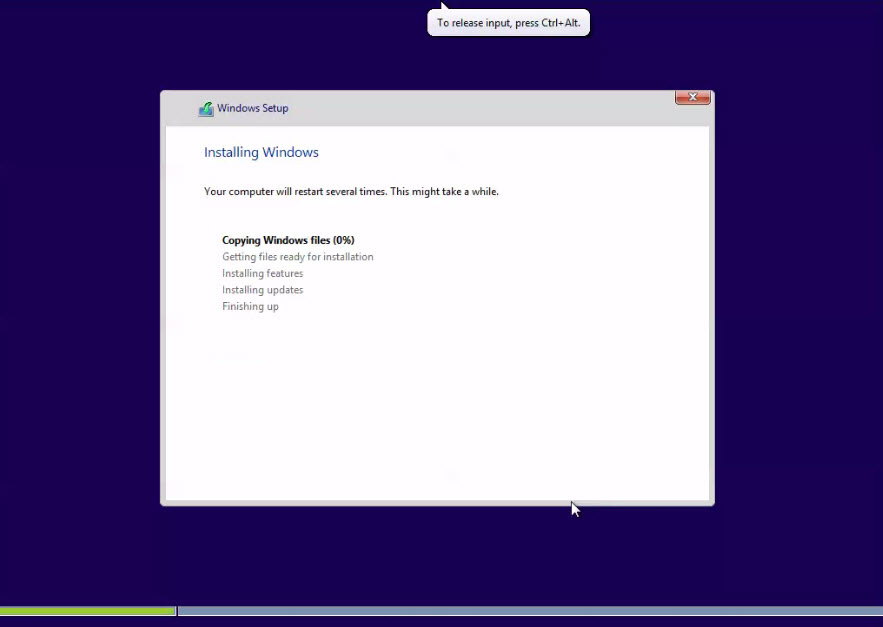
Step 18: You need to wait patiently as all the files will get copied one by one to the target partition. This may take some time depending upon how fast your computer is. (Check the screenshot below)
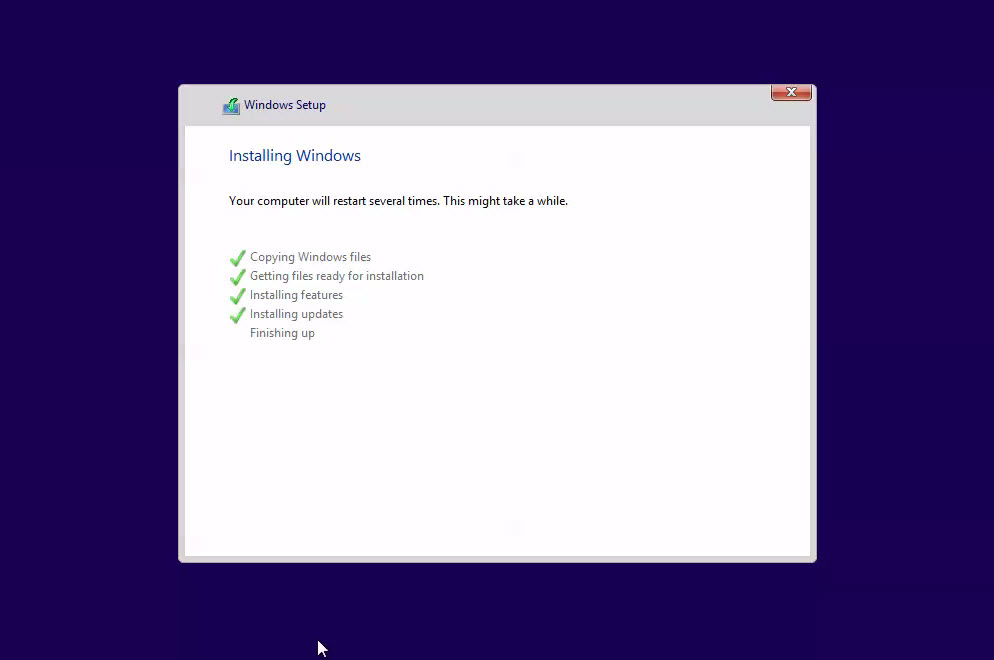
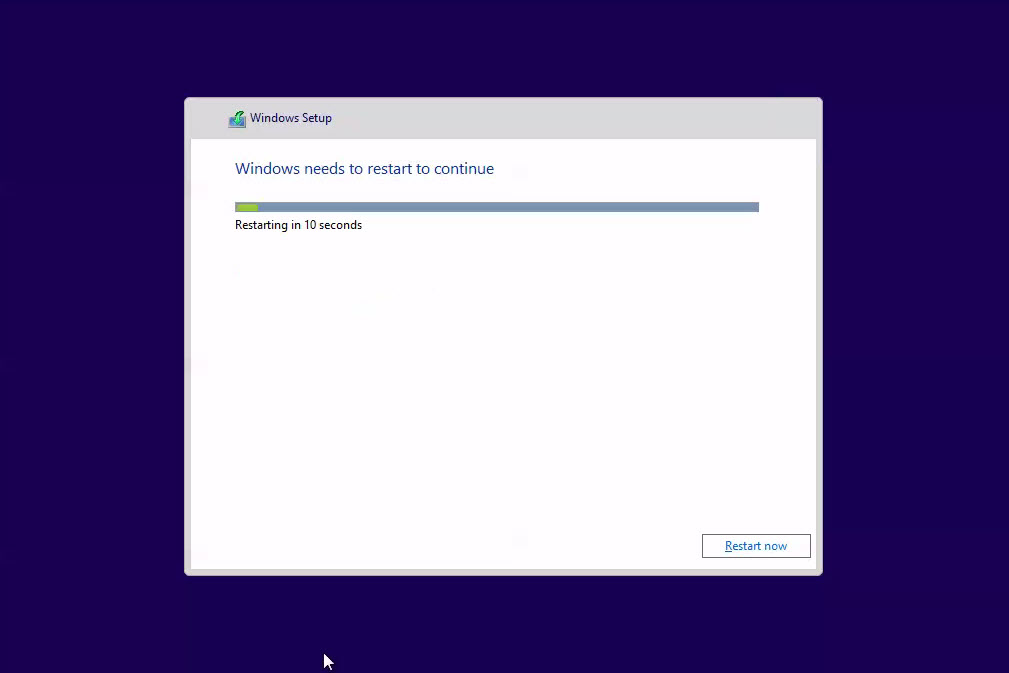
Step 19: As soon as the files are successfully copied, your computer system will restart automatically. (Check the screenshot below)
Step 20: Wait patiently for your computer to start and this time, DO NOT press any key.

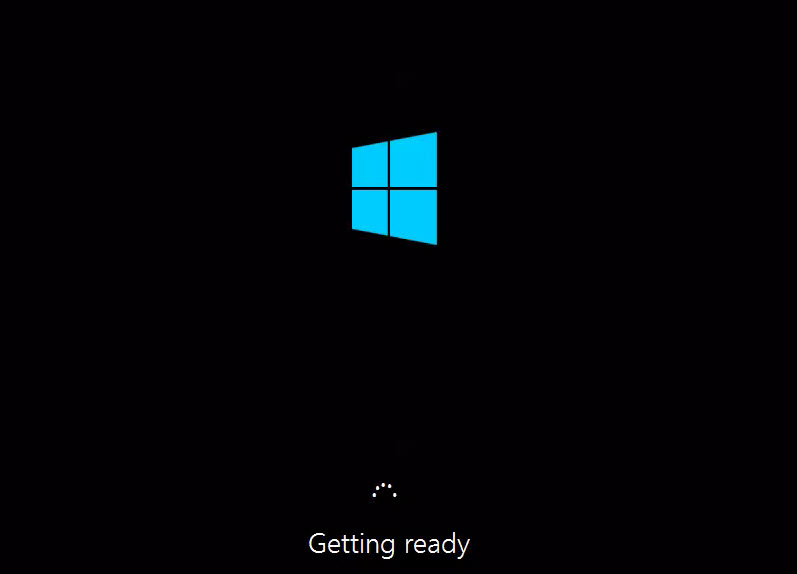
Step 21: The next screen will display the message that your system is “Getting Ready” for Windows 8 installation. (Check the screenshot below)
Step 22: In the next step, your computer will restart again. Once again, your screen will display the message “Press any key to boot from CD or DVD…” DO NOT press any key here. (Check the screenshot below)
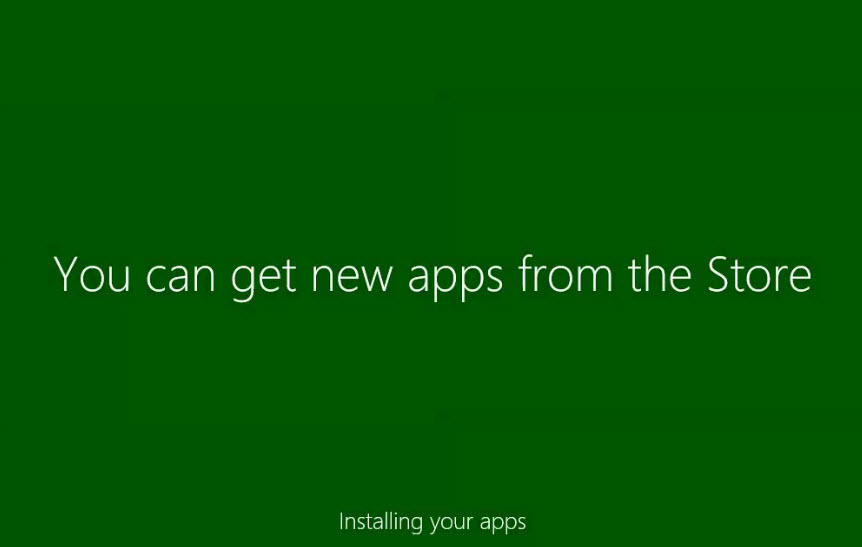
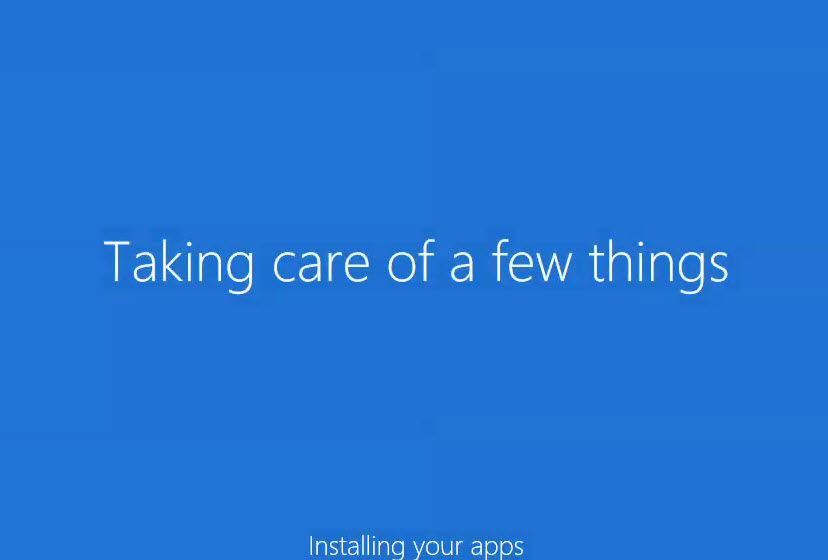
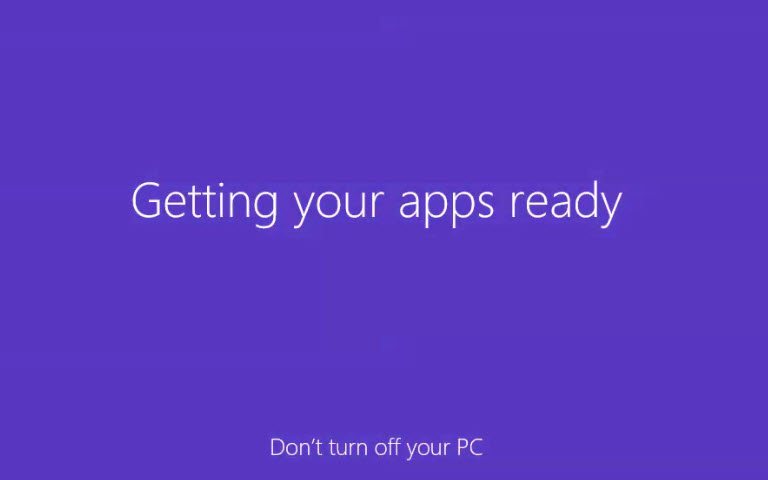
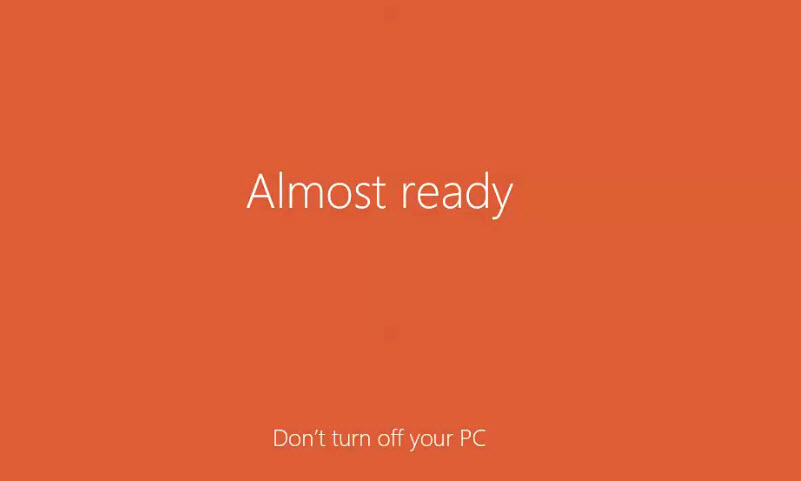
Step 23: As soon as your computer system restarts again you will see the sequence of following screens appearing one by one. (Check the screenshots below)


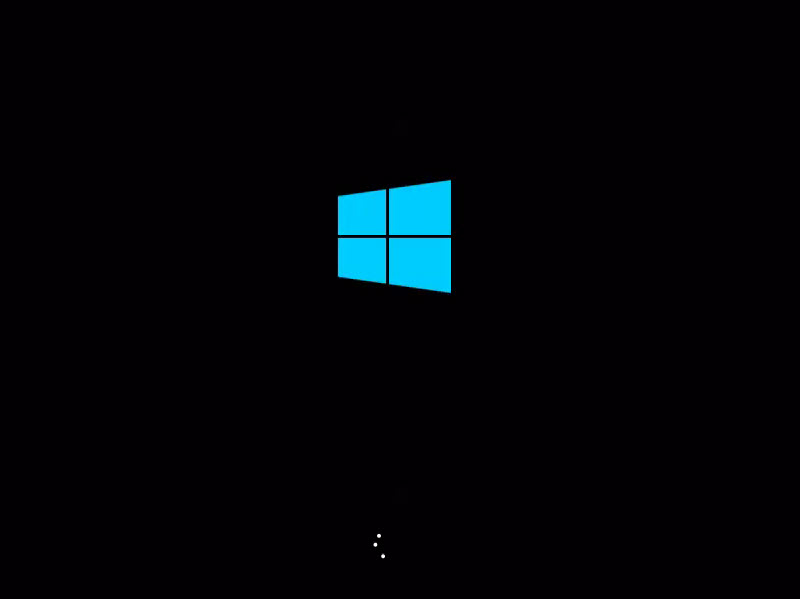
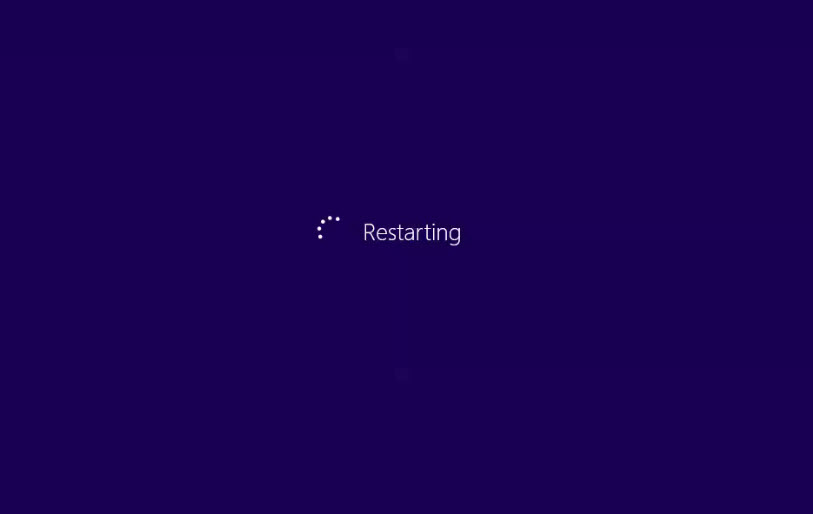
Step 24: Your new Windows Operating System is now restarting. (Check the screenshot below)
Step 25: Your computer system will reboot itself displaying the same message once again, “Press any key to boot from CD or DVD…” Make sure you don’t press any key again.
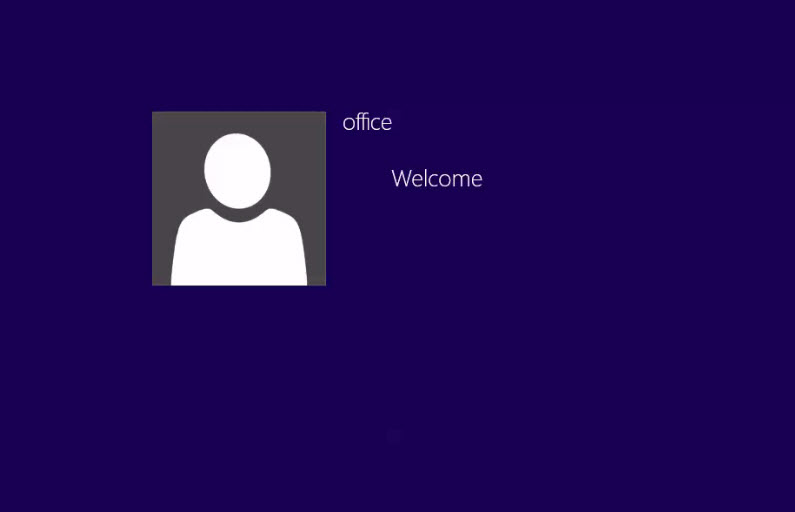
Step 26: Now, as your system boots again you will be greeted by the Welcome Screen. (Check the screenshot below)
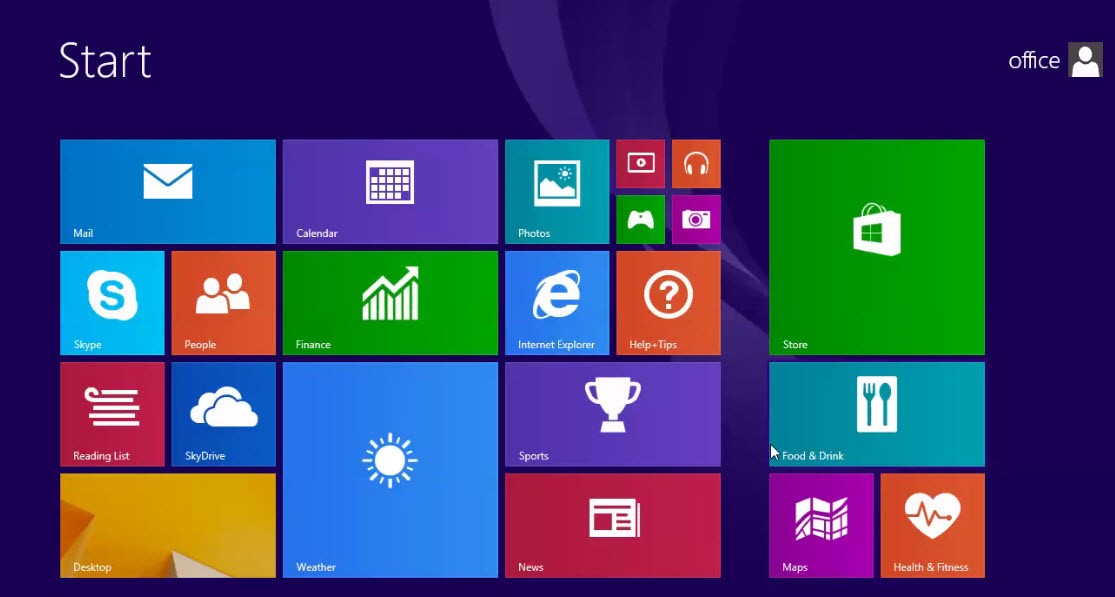
Step 27: Congratulations, your new Window 8 is now absolutely ready for use now. (Check the screenshot below)
Having Difficultly Installing Windows 8 on Your Computer?
If you’ve been unable to follow the step by step guide on Windows 8 installation above (just in case), don’t worry! We can help you out by providing answers to your specific queries. Please drop questions or narrate the problem you are facing while installing Windows 8 in comments below.