


The Domain Name System (DNS) is a standard technology formulated for managing the Website names and other internet domains. It is the DNS technology which ensures that when you type in a website’s name (URL) in web browser’s address bar, your computer can actually find its location and serve you the information you need.
When we want to access a particular website with its “name,” we make use a DNS server. The DNS server mechanism involves the usage of alphanumeric names; these alphanumeric names are converted into IP addresses. So basically, it’s mapping system. A DNS name is like a “nickname” that corresponds to a unique IP address of the web server.
Here, in this article we will create a website which is to be hosted on a Web Server.
We will need a DNS Server for translating our website’s name into its IP address. If it’s done correctly, we will be able to access our website by just typing in its DNS name in the Internet Explorer.
[Read: How to create or host a website with an IP Address]
Here’s a step by step guide on how to access a website with “name” by using a DNS (Domain Name System) Server:
Step 1: Right click on the “Web” option; this option has been created on the “Web Server.”
Step 2: Click on the “Edit Bindings” option in the dropdown menu. (Check the screenshot below)

Step 3: A dialogue box will now appear on the screen. Click on the “Edit” option here. (Check the screenshot below)
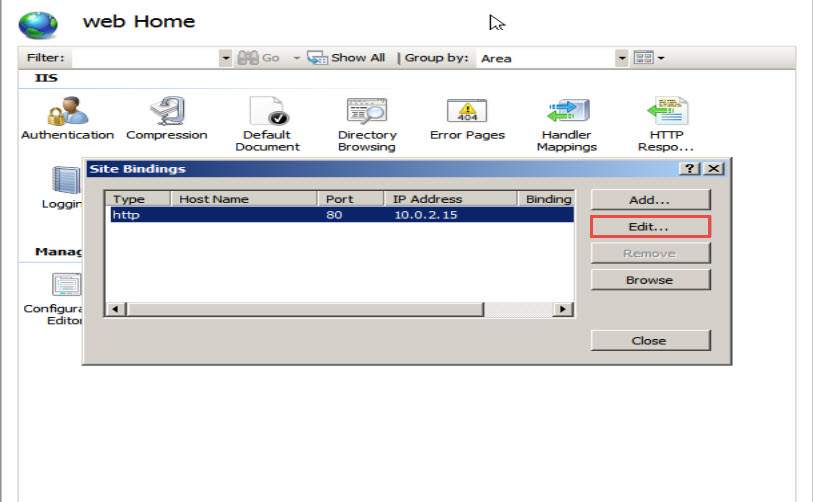
Step 4: Next, under the “Host Name” box, provide a suitable name that starts with “www.”
Step 5: Click on the “OK” button to save the changes you’ve just made. (Check the screenshot below)

Note: All these steps are carried out in Web Server. You will have to open the Web Server to execute all these steps.
Now, in the DNS Server, we have to configure both of the DNS (forward and reverse lookup) the zones.
After this, we need to add “host name” and IP addresses in both reverse and forward lookup zone.
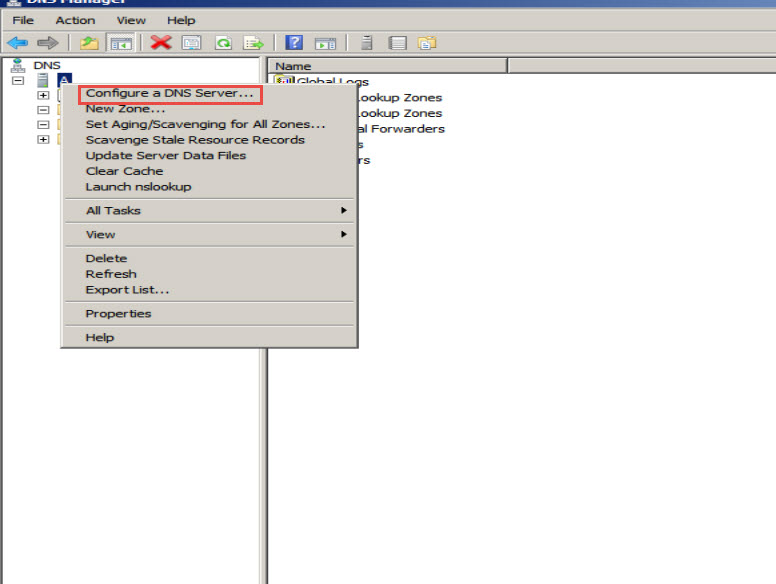
Step 6: Open the “DNS Server Manager” and right click on the “Server Name” option.
Step 7: Of the many options that appear in the drop down menu, click on “Configure A DNS Server…” (Check the screenshot below)
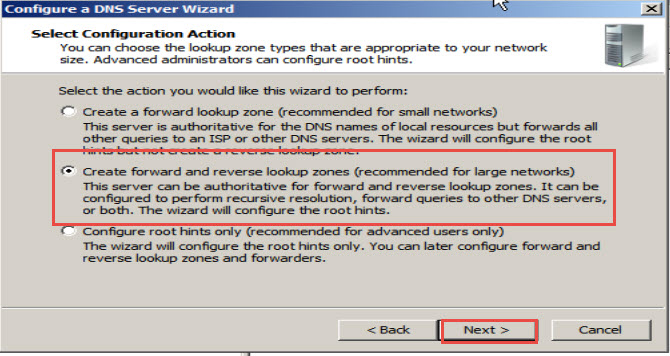
Step 8: Under the “Configure a DNS Server Wizard,” select the option contains “Forward and Reverse Lookup Zones” both.
Step 9: Click on the “Next” button to continue. (Check the screenshot below)
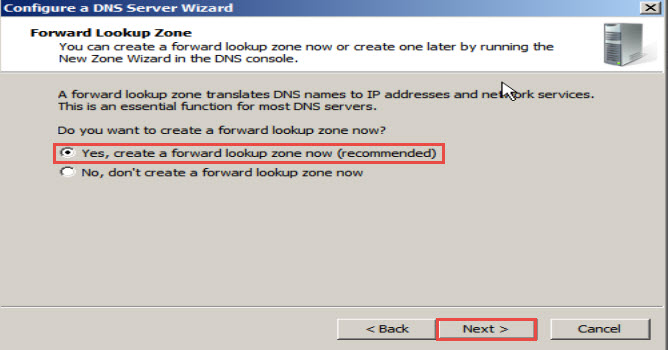
Step 10: In the next window, select the “Yes, create a forward lookup zone now (recommended)” option and hit the “Next” button to proceed. (Check the screenshot below)
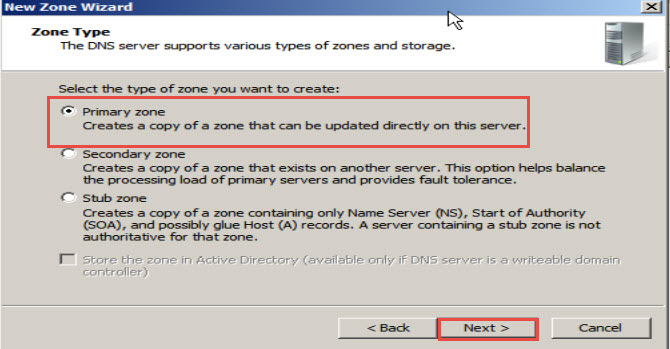
Step 11: Now, check the “Primary Zone” radio button and next, click on the “Next” button to continue. (Check the screenshot below)
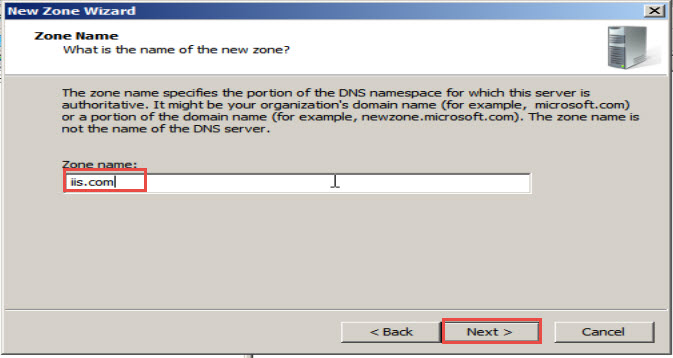
Step 12: The “Zone Name” box will now appear on the screen; type in any “Domain Name,” separated by a dot.
Step 13: Click on the “Next” button to continue. (Check the screenshot below)
Step 14: In the next window, select the “Yes, create a reverse lookup zone now” option and click on the “Next” button to proceed. (Check the screenshot below)

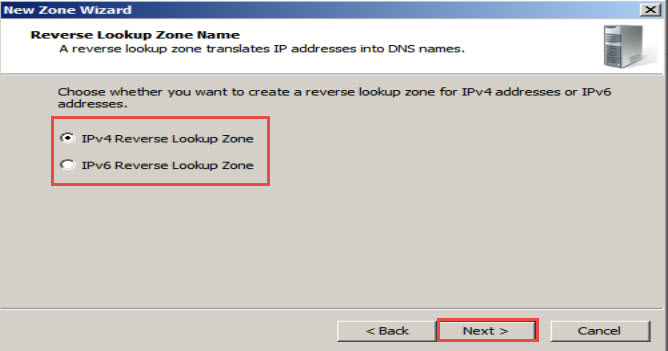
Step 15: Next, select IPv4/IPv6 Reverse Lookup Zone and click on the “Next” button to continue. (Check the screenshot below)
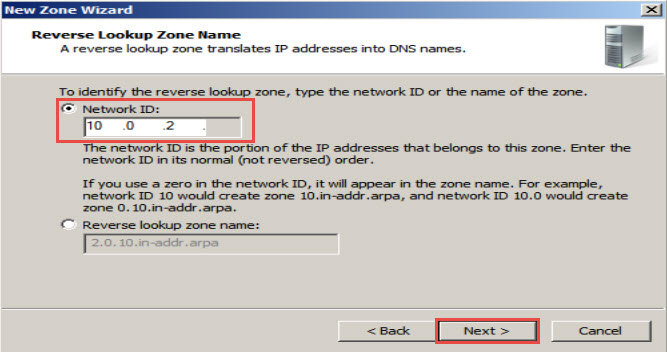
Step 16: The “New Zone Wizard” window will now appear on your screen. Enter the “Network ID” of the IP address which is currently in use in the network.
Step 17: Click on the “Next” button to continue. (Check the screenshot below)
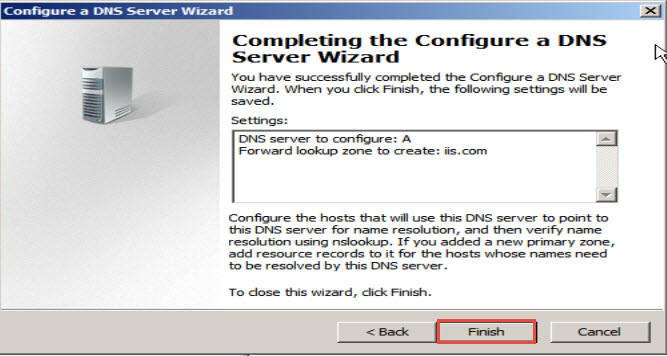
Step 18: Click on the “Finish” button. (Check the screenshot below)
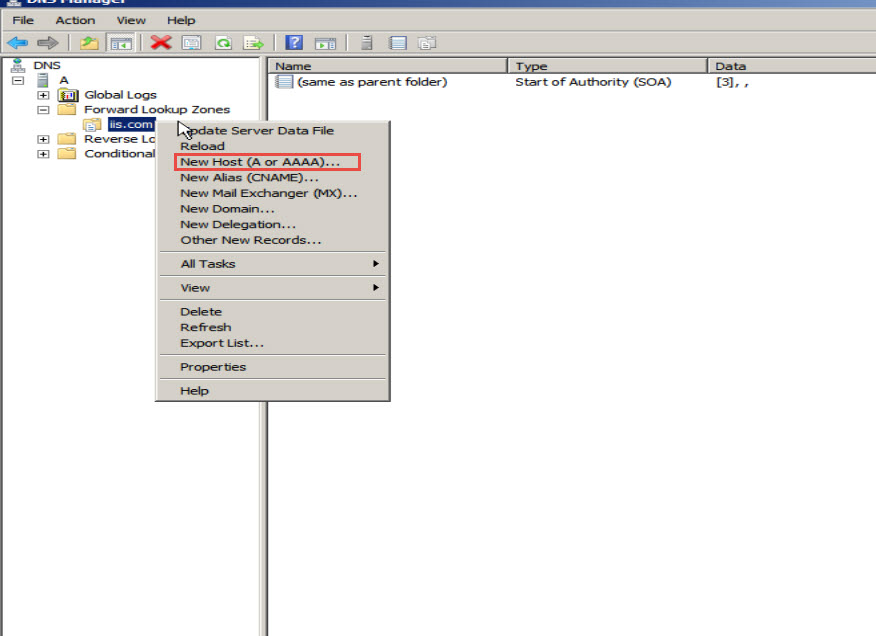
Step 19: Now, you need to provide details of the “Host” and “Pointer” in the both forward and reverse lookup zones. So, right click on the “Domain Name” option.
Step 20: Click on the “New Host (A or AAAA)…” option as shown. (Check the screenshot below)
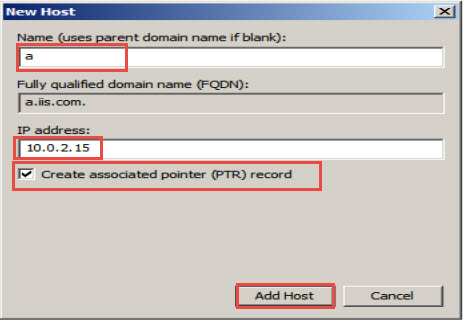
Step 21: In the “New Host” window that appears on your screen, enter the name of the computer in “User Parent Domain Name”, along with the IP address of the computer.
Step 22: Next, check the “Create associated pointer (PTR) record” option.
Step 23: Click on the “Add Host” button. PTR (pointer) record has been automatically created in the reverse lookup zone. (Check the screenshot below)
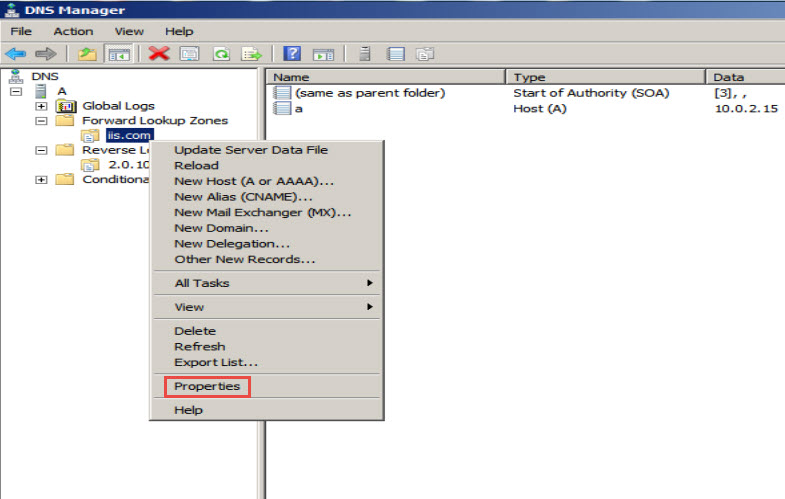
Step 24: Now, to add “Name Server” entries for both Zones, right click on the “Domain Name” option in left panel and in the menu that opens up, click on the “Properties” option. (Check the screenshot below)
Step 25: Next, select the “Name Servers” tab and click on the “Add…” button. (Check the screenshot below)
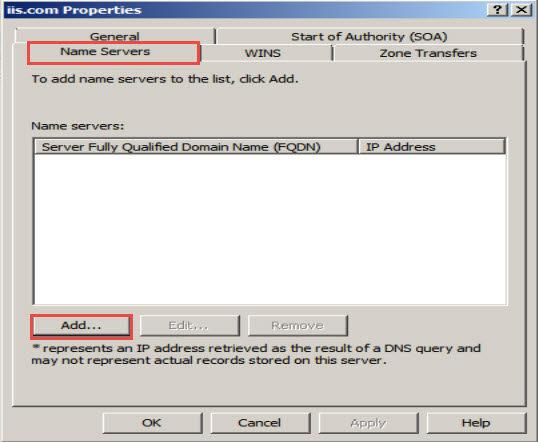
Step 26: Type in a fully qualified domain name under the “IP Address of this NS record” input box.
Step 27: Click on the “Resolve” button on the right. It gets an IP address automatically. Next, click on the “OK” button. (Check the screenshot below)

Step 28: Repeat the same process for adding an entry for the Reverse Lookup Zone.
Step 29: To verify that your website is actually accessible by name, logon to another computer and change some network settings. You must give IP address of the DNS Server in preferred DNS server section. (Check the screenshot below)

Step 30: Open the “Internet Explorer” and enter the name of the target website in the address bar. Your website will open with name by using a “Domain Name Server”. (Check the screenshot below)
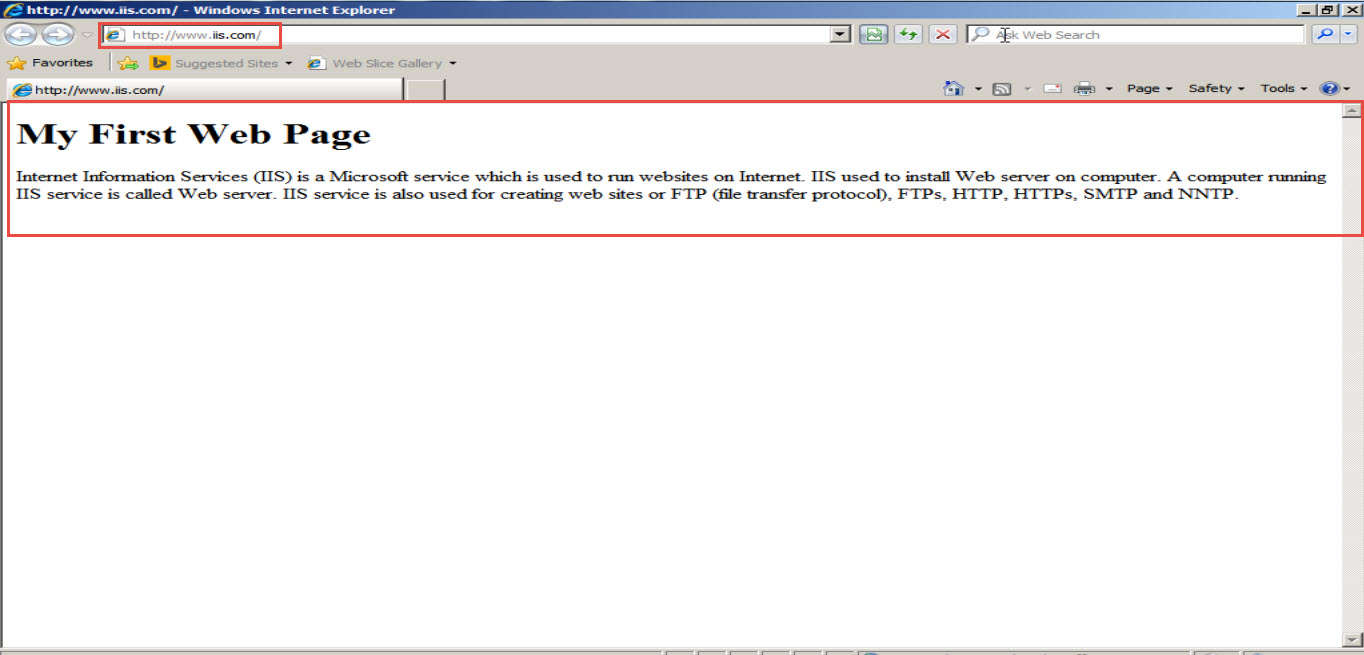
This way, we can access multiple websites by using a DNS server.
Need Help?
If you are yet to learn how to setup a DNS server in Windows or how to create a website on Windows Server, we suggest you read other step by step tutorials here.
In case you are unable to access a website with name by using a DNS and believe that both DNS Server and Web Server are working fine, please let us know in the comments below. Try to be as descriptive as possible and do mention the exact issue. Our IT support experts are here to help you out!