


Computers operating over a network need unique and easily recognisable names. This way, they can easily identify and communicate with each other. If two computers functioning on the same network have identical name, it will obviously lead to a conflict for network communications. While most computers come with a default name, you generally have the option to change them. In this post, we will explain exactly that.
It is advisable to use easily recognizable and short name for your computer. Generally, fifteen characters or less are considered ideal for PC names.
When naming your PC, make sure that you only use Internet-standard characters comprising of numbers between 0 and 9, upper and lower case letters from A to Z, along with the following characters:
< > – ; : ” * + = \ | ? ,
Here’s a step by step guide on how to change host name in Windows 8:
Step 1: Log in to your computer system with administrative rights.
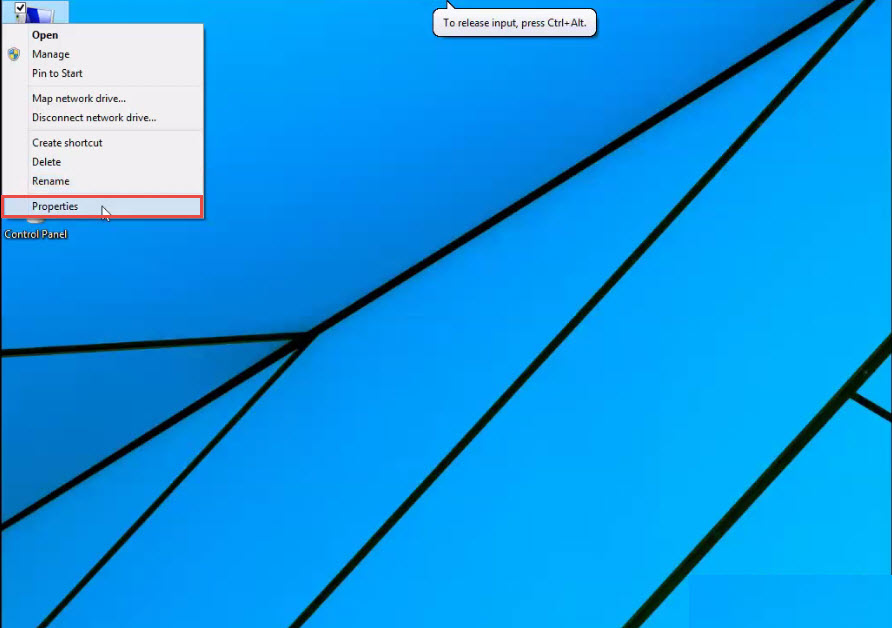
Step 2: Right click on the “My Computer” icon on your desktop and select the “Properties” option from the dropdown menu. (Check the screenshot below)
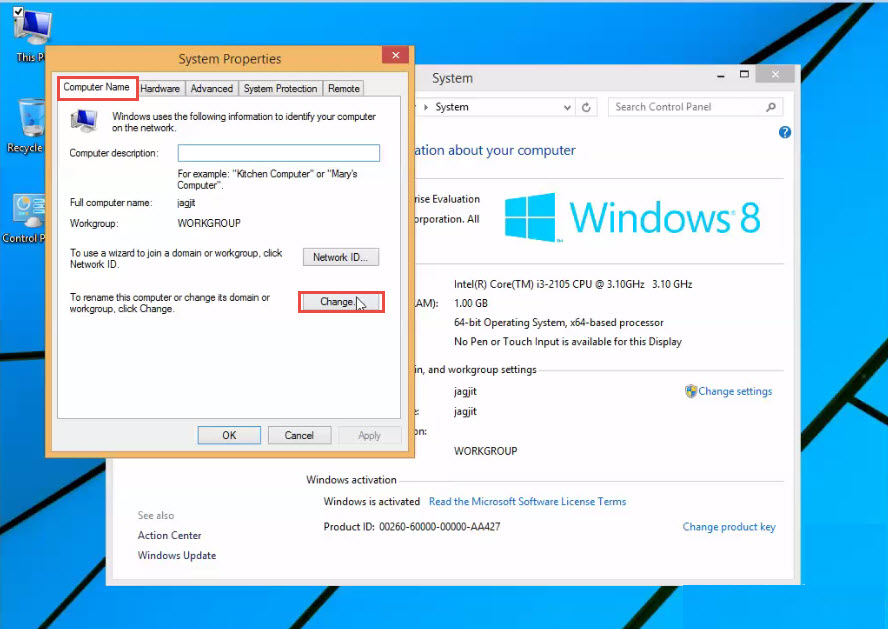
Step 3: The “System” window will now open on your screen. Now, click on the “Change Settings” tab to proceed. (Check the screenshot below)

Step 4: Of the many options available to you, click on the “Computer Name” tab on the “System Property” window.
Step 5: Next, click on the “Change” button. (Check the screenshot below)
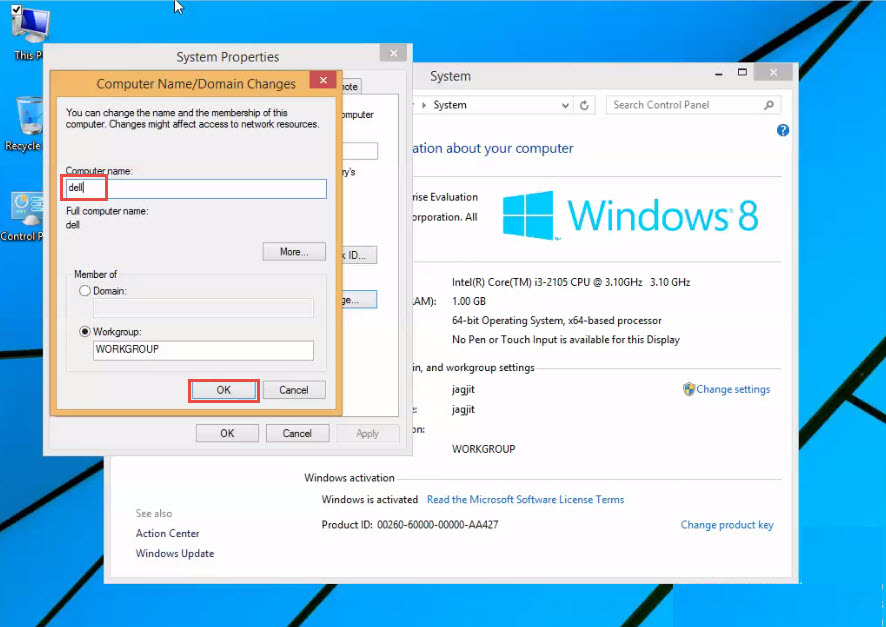
Step 6: Computer Name/Domain change window will now display the existing name of your computer. Delete the old name and type in your new hostname for Windows 8 system.
Step 7: Click on the “OK” button to save all chances you have just made. (Check the screenshot below)
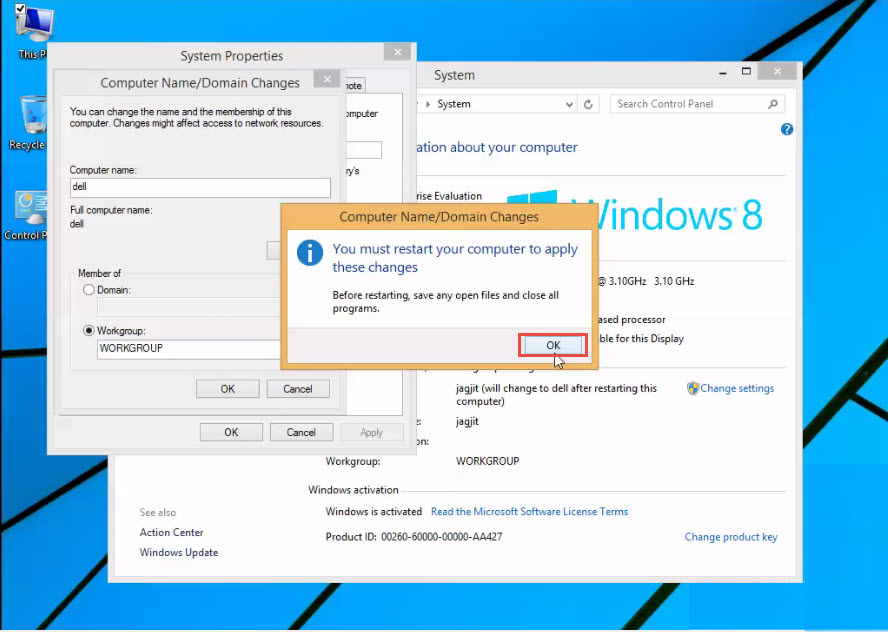
Step 8: As soon as you hit the “OK” button, a “Computer Name/Domain Changes” dialogue box will appear on the screen. Click on the “OK” button to continue. (Check the screenshot below)
Step 9: Click on the “Close” tab on the “System Properties” window. (Check the screenshot below)

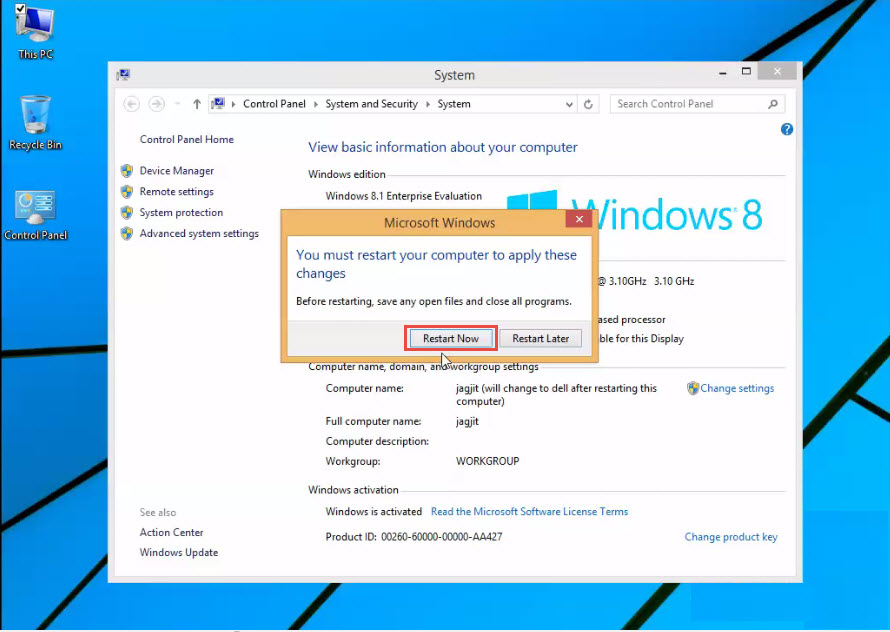
Step 10: A “Microsoft Windows” dialogue box will now appear on your screen. Click on the “Restart Now” button. (Check the screenshot below)
After you restart your Windows 8 machine, it would have acquired a new host name. Congratulations!
If you were unable to change host name in Windows 8 due to some reason, please write the problem you are facing in the comment section below. One of our IT support professionals will respond to any questions/doubts you may have.