


Title: Steps on Setting Disk Quotas for a User in Windows 7
The disk space on your system can be restricted by setting Disk Quotas for different users in Windows 7 operating system. This functions by warning the system administrator before any user consumes excessive disk space or when a partition becomes full.
The process can be configured for both individual users as well as other user groups.
This allows the system administrator to conveniently manage separate spaces for particular users as well as individual groups.
[Read: How to add a User and User Group]
Disk Quotas provide a limited Hard Disk space to the users. This greatly helps in reducing the wastage of Hard Disk space by the users as it allocates limited space in a reasonable way.
It must also be noted that Disk Quota is always implemented on Hard Disk drive with NTFS partition. So, if you want to set up disk quotas for users, make sure that the drives are in NTFS format. We offer fun computer training classes learn more at Windows 7 training Chicago.
Follow the step by step instructions given below for setting Disk Quotas for a user in Windows 7:
Step 1: Suppose you have a user named as “user1. Now, you want to implement Disk Quota system of space allocation for this user. You can get started by double clicking on “Computer” icon on your Microsoft Windows 7 Desktop.
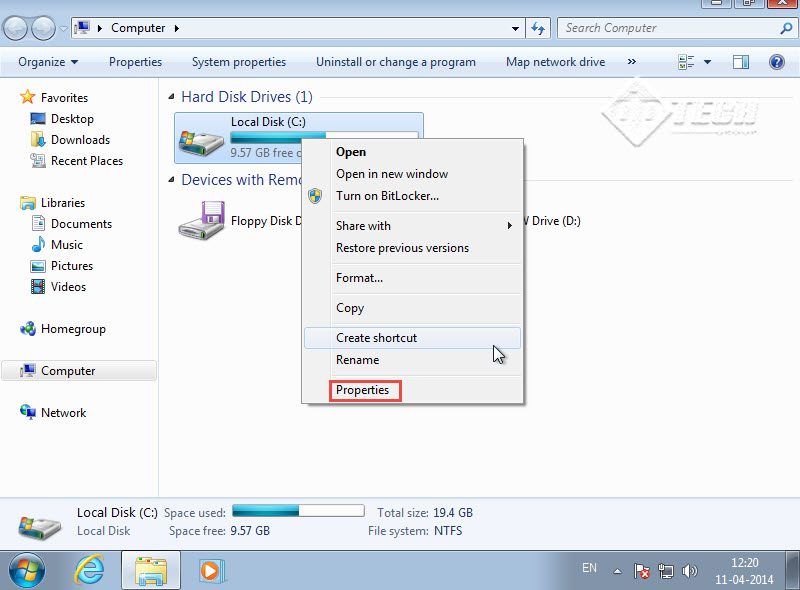
Step 2: Right Click on C-Drive/D-Drive and click on “Properties” tab. (Check the screenshot below)
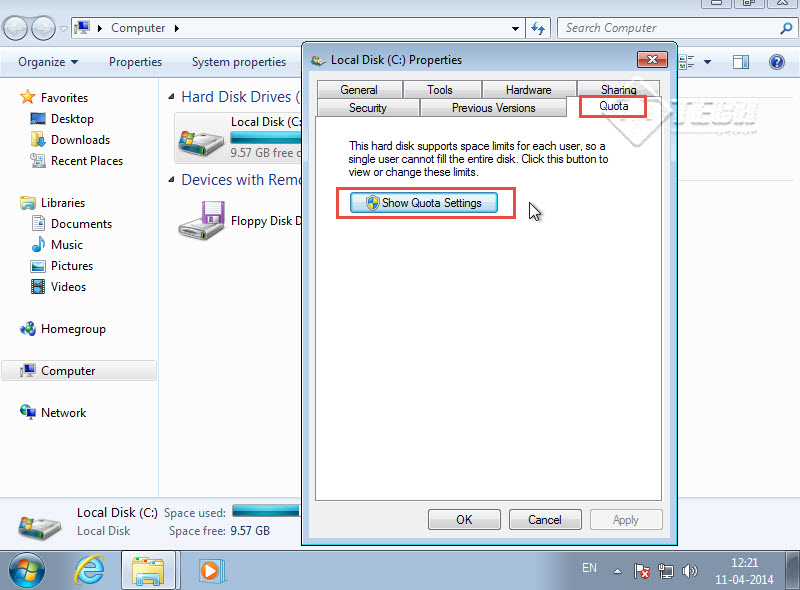
Step 3: Amongst the many options that are displayed on the “Local Disk Properties” window, click on “Quota” tab.
Step 4: Next, click on “Show Quota Settings” tab. (Check the screenshot of windows 7 below)
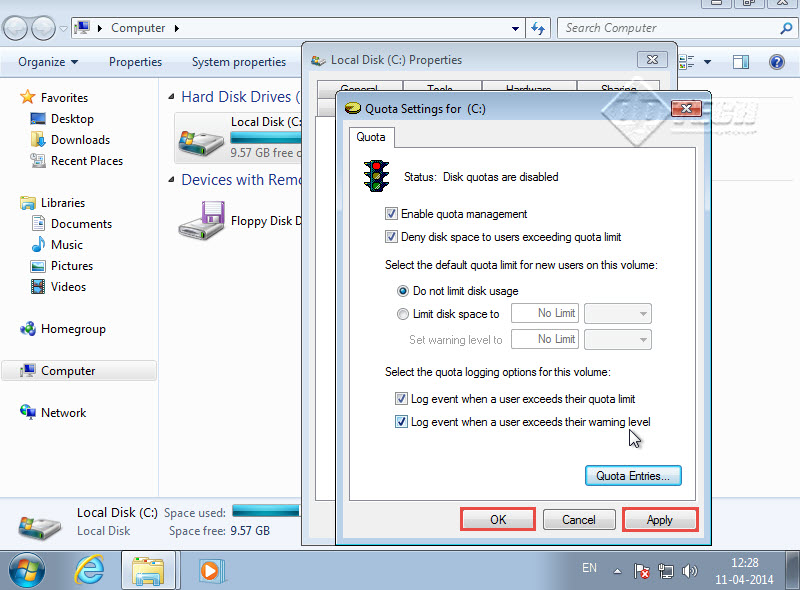
Step 5: Quota Settings for the selected drive will appear in-front of you. Tick mark on all the available options, i.e.
- Enable Quota management option
- Deny disk space to users exceeding quota limit
- Log event when a user exceeds their quota limit
- Log event when a user exceeds their warning level
Step 6: After selecting the above stated options, click on “Quota Entries…” (Check the screenshot below)
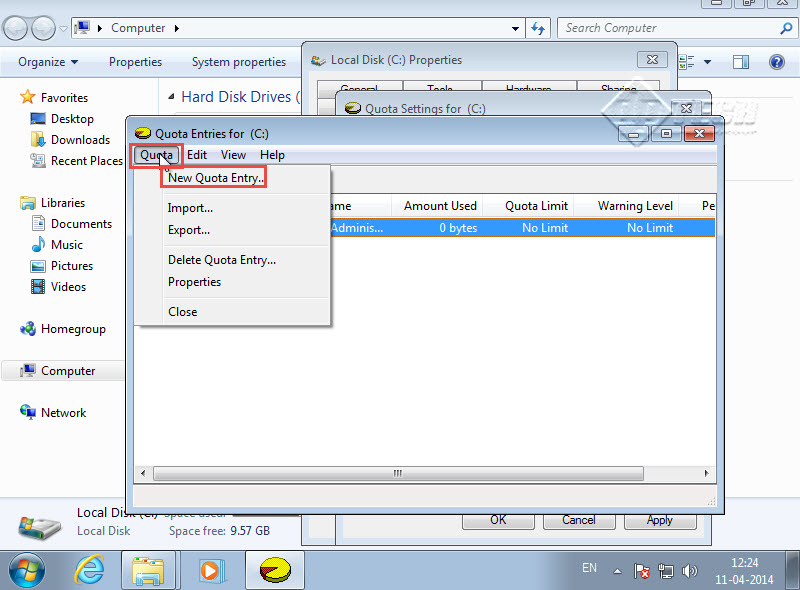
Step 7: When the next window opens up, click on “Quota” tab and then, click on “New Quota Entry” tab. (Check the screenshot below)
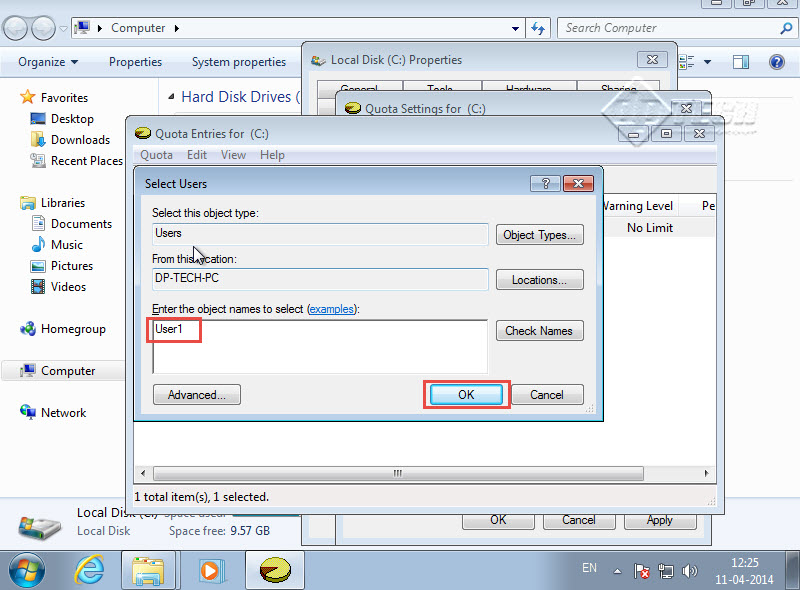
Step 8: In the “Select User” window, type in the user name “user1” and click on the “OK” button to confirm the setting. (Check the screenshot below)
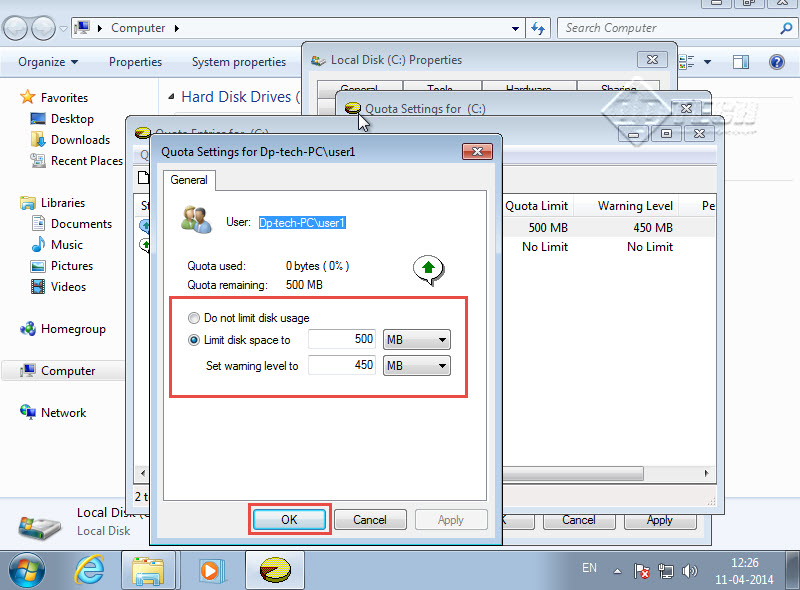
Step 9: A dialogue box displaying “Quota Setting” for the selected user will appear. Select the “Limit Disk Space” up to 500 MB.
Step 10: Maintain “Set Warning level to” up to 450 MB.
Step 11: Click on the “OK” button to save the changes made. (Check the screenshot below)
Step 12: Click on the “Apply” button to save the changes made and next, click on the “OK” button. (Check the screenshot below)

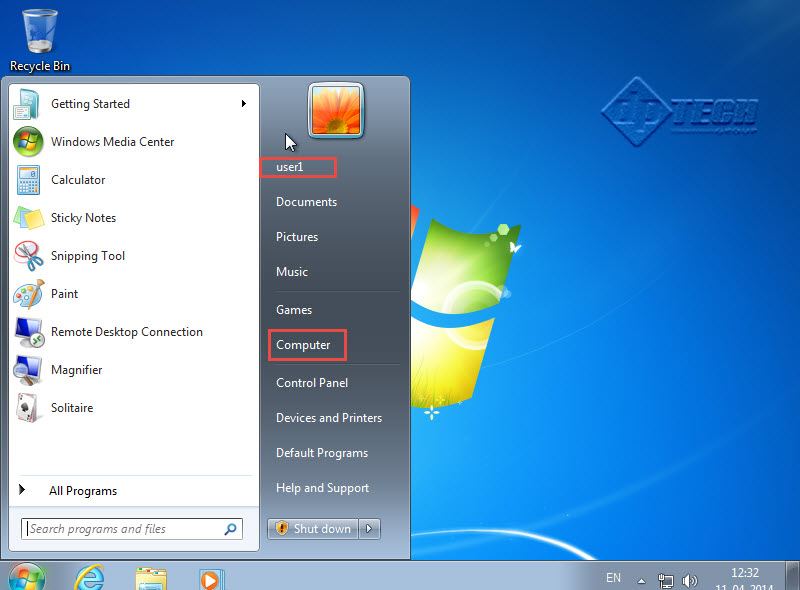
Step 13: To check how the new settings for disk quotas for the user are working, login to “user1” account and go to the Start Menu. Click on “Computer” tab. (Check the screenshot below)
Step 14: Here, you will see the set Quota size of the user, i.e. 500 MB. Now “user1” cannot use more than 500 MB of storage space. (Check the screenshot below)

Here, the total space used by the user is 482 MB.
Guess that was easy, right?
If you have been unable to set disk quotas for some users on your computer in Windows 7, drop your queries in the comments below. One of our experts will respond as soon as possible.
Are you interested in becoming a Windows 7 expert? Get in touch with us for excellent classroom training for Windows 7 and other Microsoft products.