


Windows 7 is a personal computer Operating System. It was launched by the Microsoft Corporation in October 2009 as an upgrade from Vistas. In this post, we will guide you on how to install Windows 7 Operating System through easy to follow steps and supporting screenshots. We offer instructor-led classroom training courses, check it out at Windows 7 training Chicago.
Windows 7 is loaded with some new user friendly interface features; it is, for example, much easier to deal with multiple-open windows. Basically, these windows store the hard copy data in the form of a soft copy in the computer. Windows 7 has definitely proved to be better than Windows Vista in term of functionality, stability and user experience.
While upgrading to Windows 7, you can either choose a 32-bit version (x86) or the 64-bit version (x64). The choice between the two largely depends on the hardware of your computer system and also on the availability of drivers and other software that make everything work on your PC.
Mentioned below is a step by step guide on how to install Windows 7 on a computer:
Step 1: Before you get started, make sure that your the CD/DVD-ROM drive is set as 1st device boot device. The default setting may have the hard disk as the 1st boot device. If that’s the case, you will have to alter BIOS settings.
Step 2: Insert your Windows 7 DVD into the DVD-ROM and restart your system.
Step 3: The moment your system restarts, the following message will appear on your screen, “Press Any Key to Boot from CD or DVD…” Press any key to boot from the Operating System DVD. (Check the screenshot below)

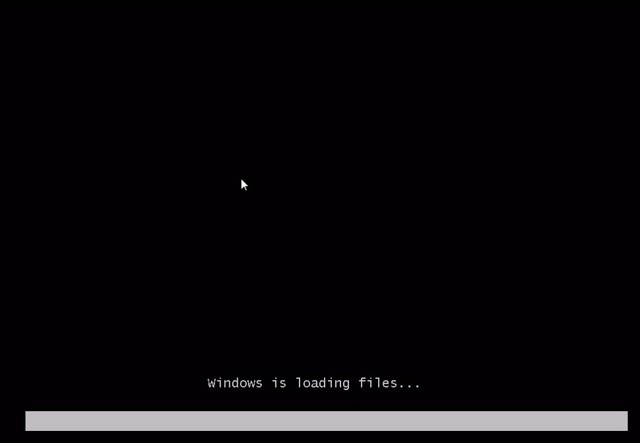
Step 4: “Windows Is Loading Files…” message will appear on your screen. (Check the screenshot below)
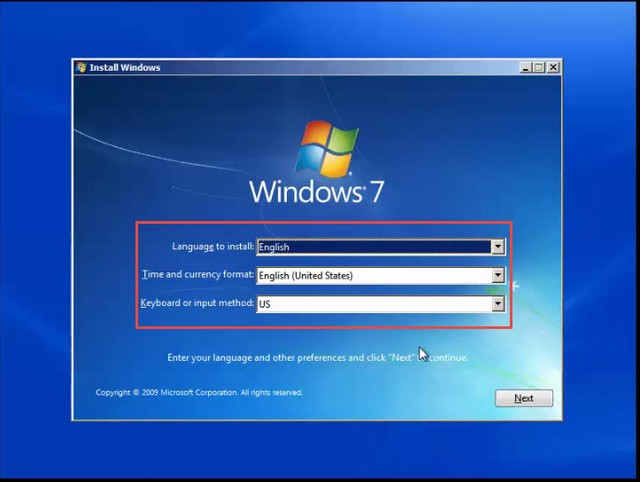
Step 5: A dialogue box displaying “Install Windows” options will open in-front of you. You are required to select:
- Language To Install (the language you want for your Windows 7 OS)
- Time And Currency Format (you can also change it later on)
- Keyboard Or Input Method
Step 6: After feeding in the required information, click on the “Next” button to continue. (Check the screenshot below)
Step 7: Your Windows 7 OS is now ready for installation. Click on the “Install Now” button below the Windows 7 logo to proceed.

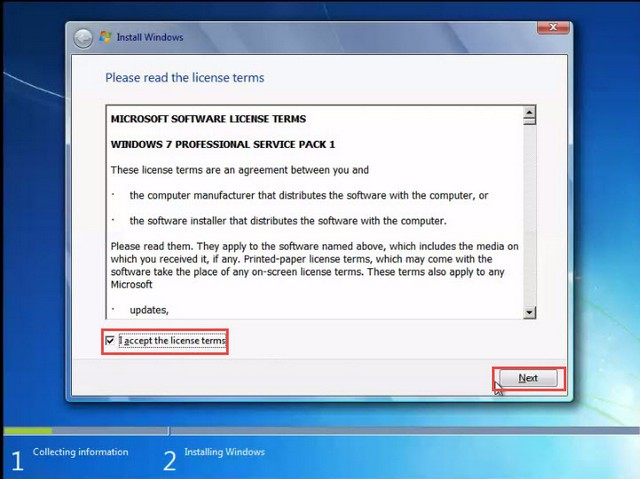
Step 8: A dialogue box displaying “Microsoft Software License Terms” will now appear on your screen. To proceed, you need to check the “I Accept the License Terms” message.
Step 9: Click on the “Next” button to continue with the installation of Windows 7. (Check the screenshot below)
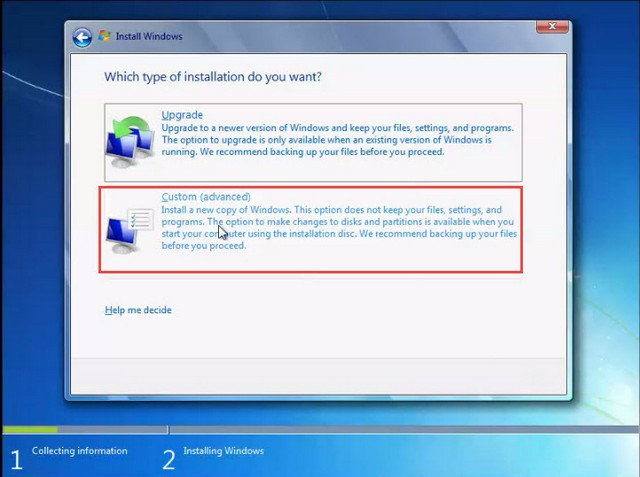
Step 10: The next dialogue box will ask you “Which Type of Installation Do You Want?” Click on the “Custom (Advanced)” option. This is basically used for creating a new copy of the Windows OS. (Check the screenshot below)
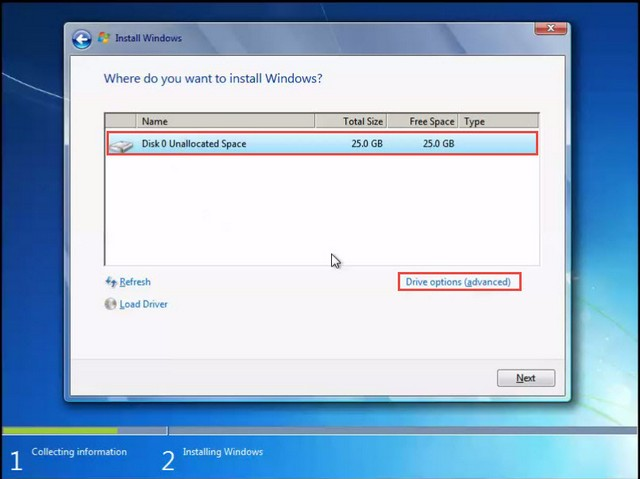
Step 11: The next screen will display the message, “Where do you want to install Windows?” Select “Disk 0 Unallocated Space.”
Step 12: Click on the “Drive options (advanced)” link at the bottom of the screen to create new partitions. (Check the screenshot below)
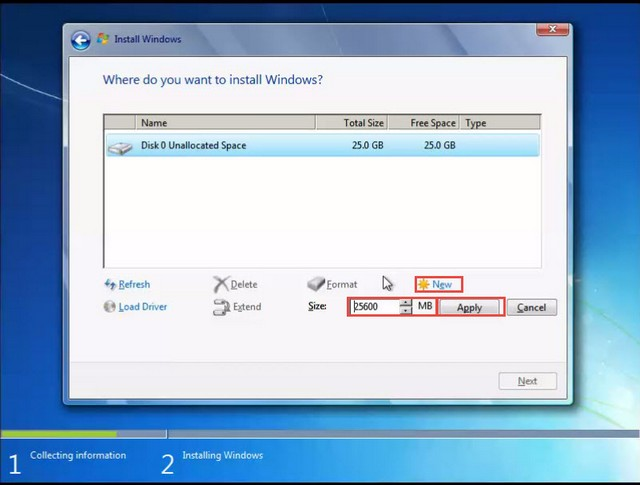
Step 13: Amongst the many options that appear on the next window, click on “NEW” and select the “Size xxxx MB” of the drive. “xxxx” here is the size of the disk partition in megabytes.
Step 14: Click on the “Apply” button to apply changes. (Check the screenshot below)
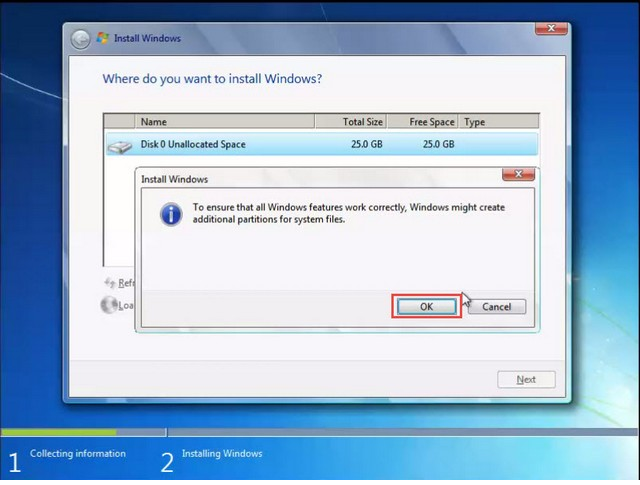
Step 15: A dialogue box displaying “Windows might create additional partitions for system files” will appear on your screen. Click on the “OK” button to allow the Windows OS to create additional partitions.
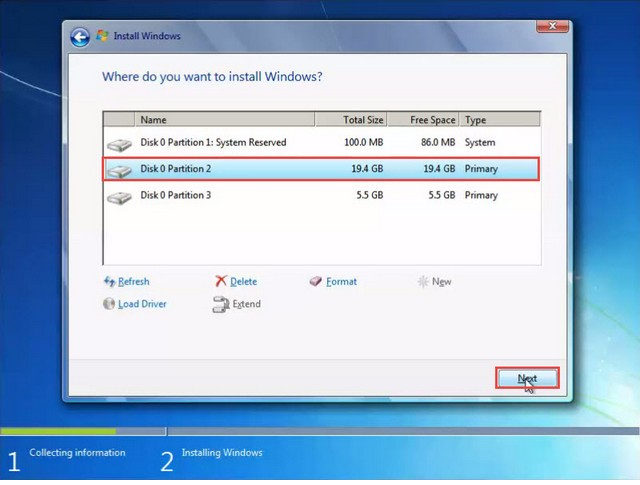
Step 16: A dialogue box featuring the query, “Where do you want to install Windows?” will once again appear on your screen. Select the partition where you wish to install the Windows 7 OS.
Step 17: Click on the “Next” button. The Win 7 installation utility will now create a partition on all the available disk space, and format it. (Check the screenshot below)
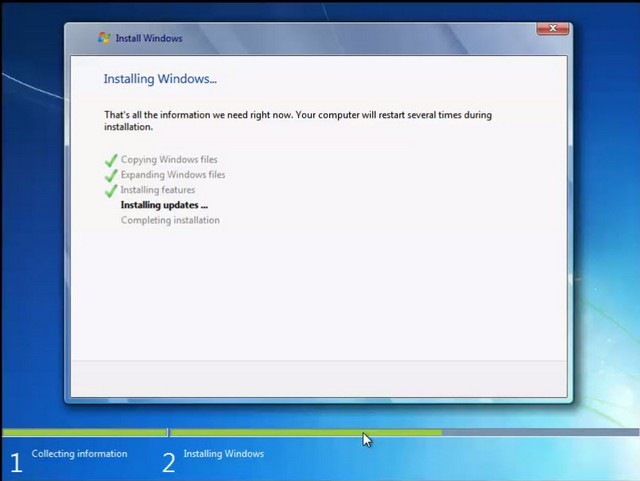
Step 18: A dialogues box displaying, “Installing Windows” will now appear on your screen. (Check the screenshot below)
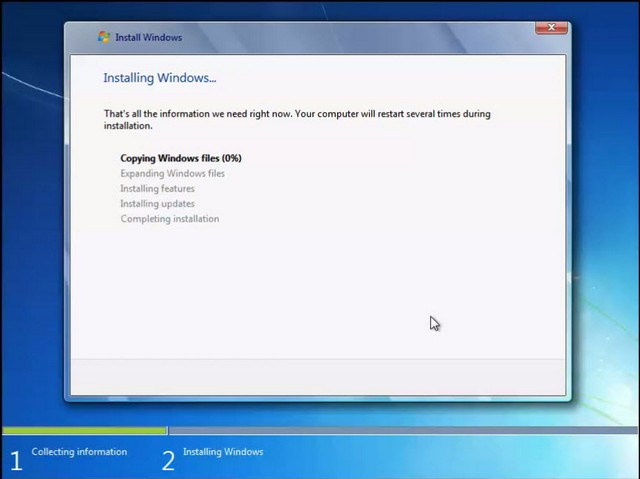
Step 19: The setup process will now copy the files from installation DVD media to the Hard Disk of the system. (Check the screenshot below)
Step 20: The next dialogue box will display the message, “Windows needs to restart to continue.” Click on the “Restart Now” button. (Check the screenshot below)

Step 21: As soon as your computer restarts, “Setup is updating registry settings” message will appear on your screen. (Check the screenshot below)

Step 22: Your system will display the message, “Setup will continue after restarting your computer” and restart again.
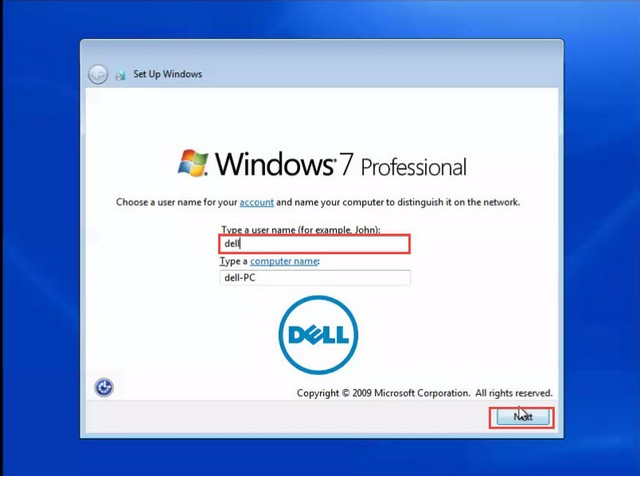
Step 23: “Set Up Windows” dialogue box will now open on your screen. Enter a suitable “User Name” and an appropriate “Computer Name” here.
Step 24: Click on the “Next” button to continue. (Check the screenshot below)
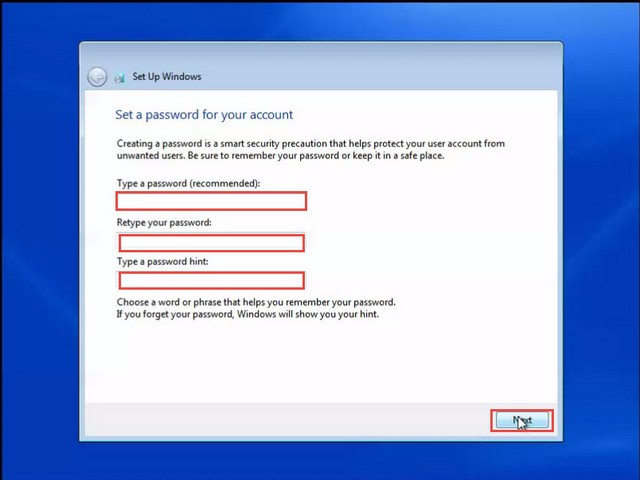
Step 25: The next “Set Up Windows” dialogue box will ask you to “Set a Password for Your Account”. Enter a secure and strong user password. This password can be changed after are done following all steps on how to install Windows 7.
Step 26: You can also provide an appropriate password hint (Required). Click on the “Next” button. (Check the screenshot below)
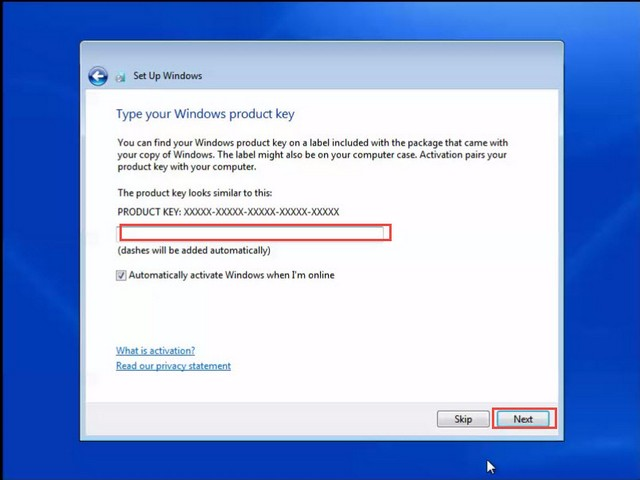
Step 27: The next “Set up Windows” dialogue box will ask you to produce the “Product Key”. In case you do not have the product key at hand, you can still click on the “Next” button, and proceed with the installation of Win 7. You will be asked to enter the product key after the Windows 7 OS is installed. (Check the screenshot below)
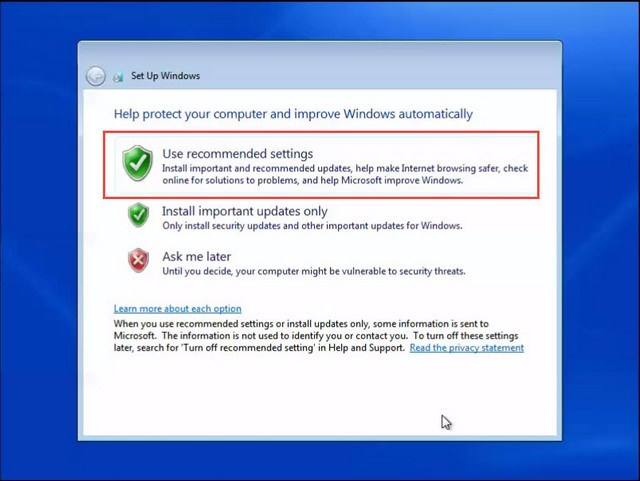
Step 28: A dialogue box will provide you with various options under “Hep Protect Your Computer and Improve Windows Automatically” subheading. Click on “Use Recommended Settings”. (Check the screenshot below)
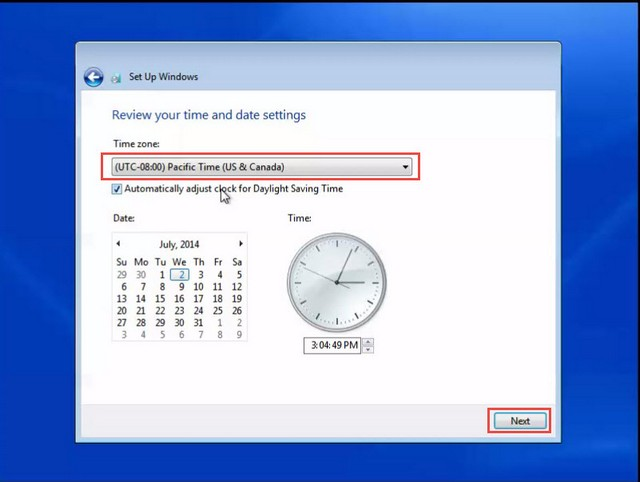
Step 29: Set the “Time Zone” and “Location” under “Review Your Time and Date Settings” that appear on the next window.
Step 30: Click “Next” to continue. (Check the screenshot below)
Step 31: Windows 7 will now finalise the settings. You can now see the Windows 7 desktop. (Check the screenshot below)
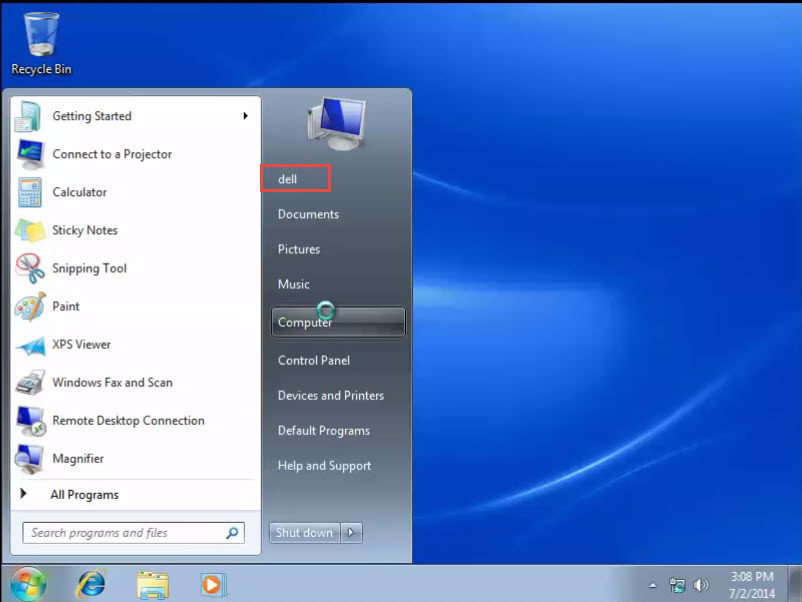
Congratulations, you have successfully installed Windows 7 on your computer system.
If you ran into some problems while trying to install Windows 7 on your home computer, please let us know by dropping a message below! We’d like to help.
Want to become a expert in Windows 7 or some other Microsoft technologies? Give us a call to learn more about our windows and other training courses in Chicago.