


Creating a scope in Win Server 2012 isn’t difficult. You just have to follow the step by step approach and once play around a bit, you should be able to create scopes without any external help.
Here’s a visual guide on how to create a scope in Server 2012:
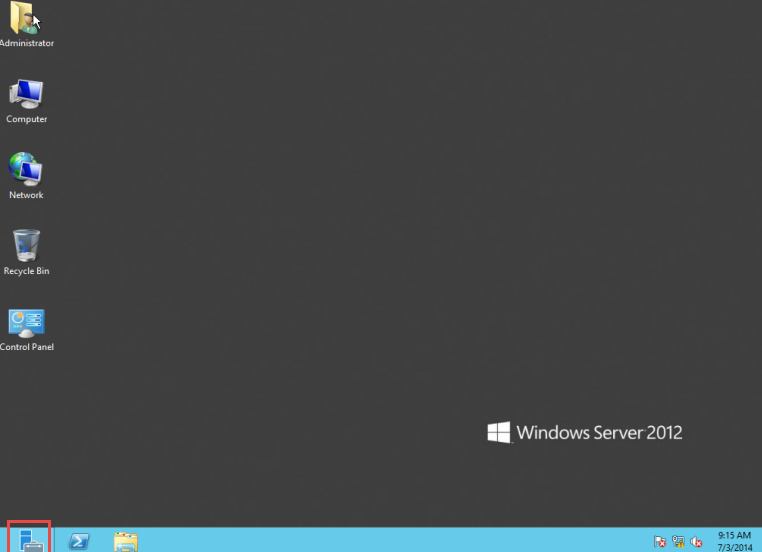
Step 1: Open the “Server Manager.” (Check the screenshot below)
Step 2: Select the “DHCP Manager.” (Check the screenshot below)

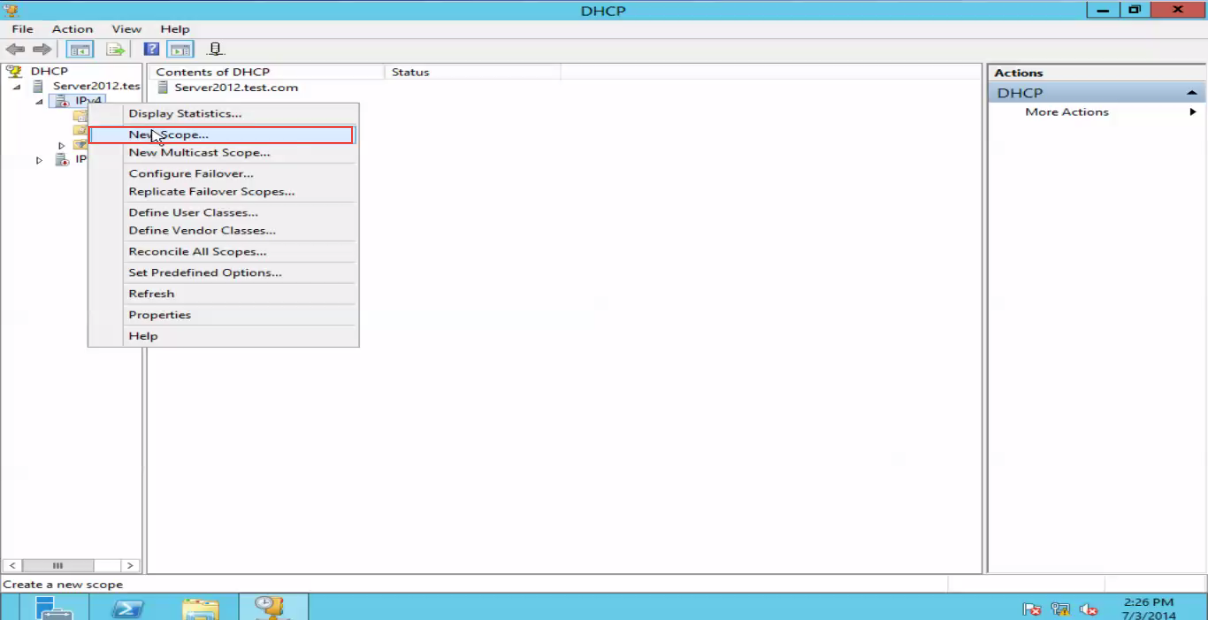
Step 3: Right Click on the IPv4 and select the “New Scope” option from the dropdown menu that appears on the screen. (Check the screenshot below)
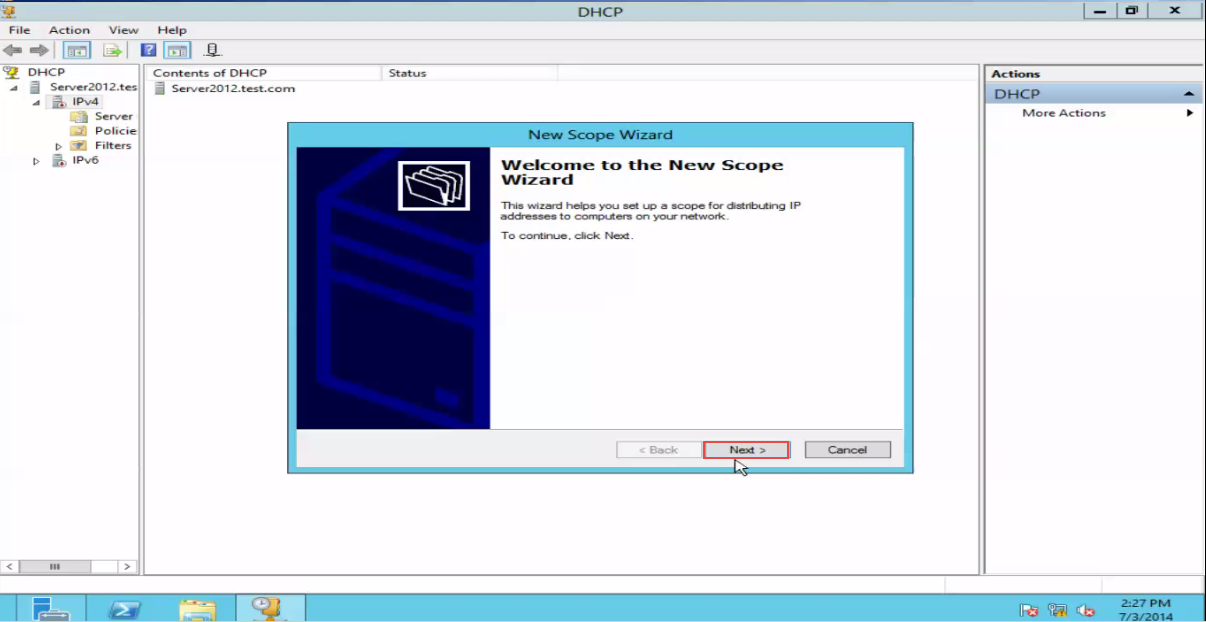
Stpe 4: Click on the “Next” button to continue. (Check the screenshot below)
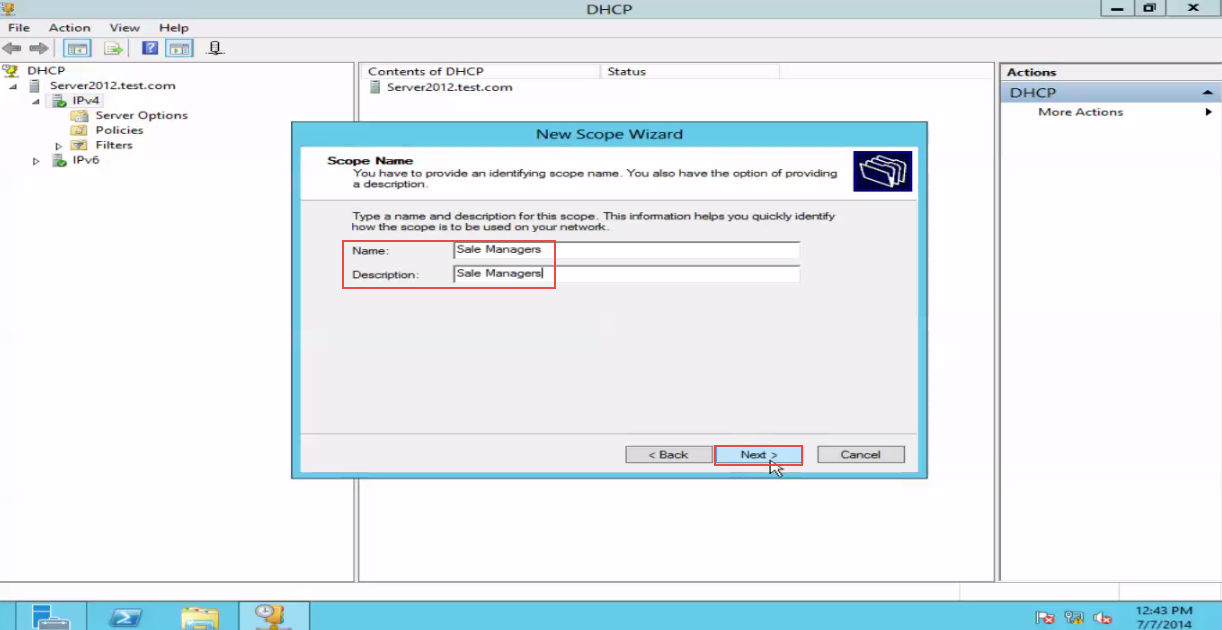
Step 5: A dialogue box will now appear on your screen. Enter the “Scope Name” in the bar. (Check the screenshot below)
Step 6: Next, enter the “IP Address Range.” (Check the screenshot below)
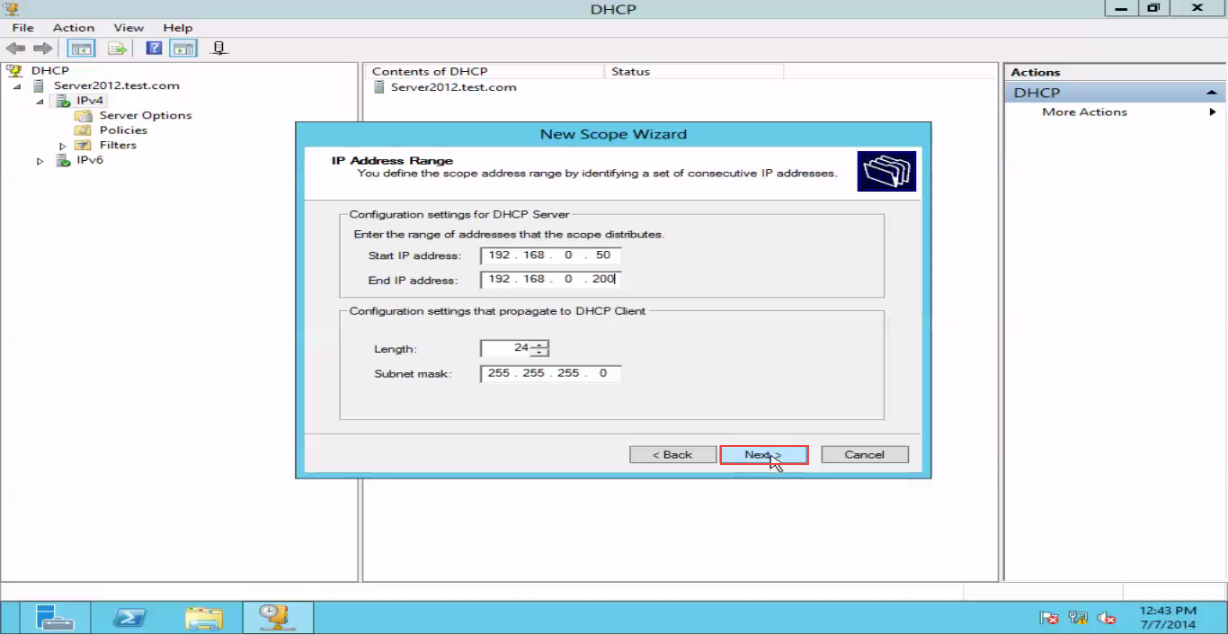
Step 7: Click on the “Next” button to continue. (Check the screenshot below)

Step 8: Select the“Lease Duration” option and then, click on the “Next” button. (Check the screenshot below)

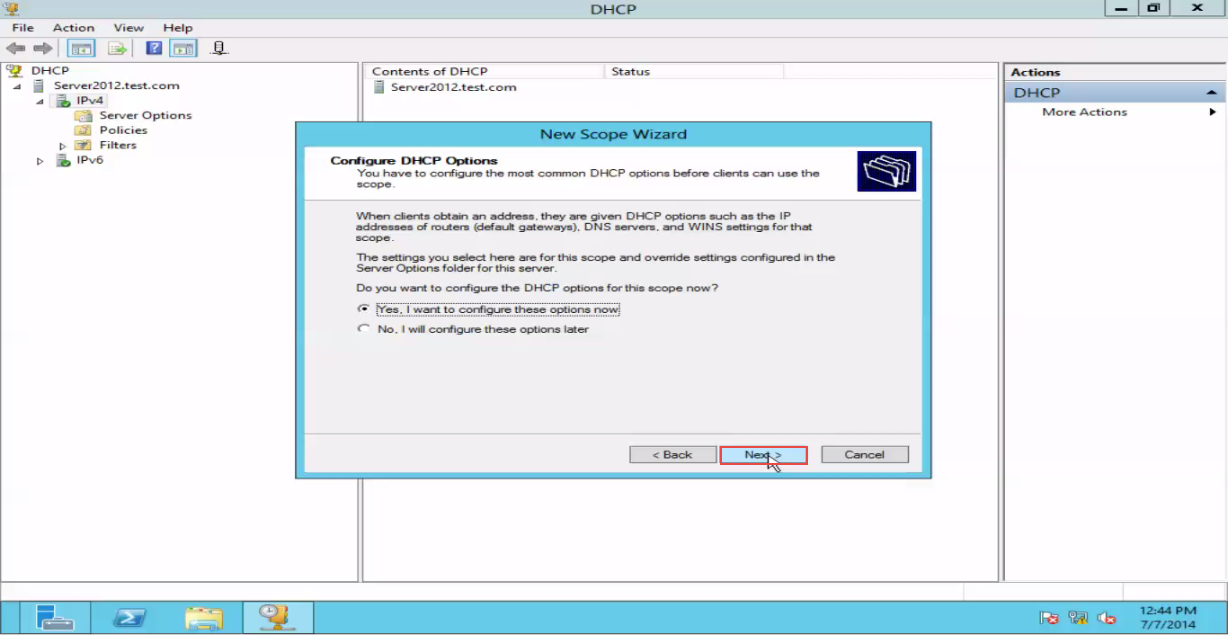
Step 9: Select the “Configuration DHCP Option” option and click on the “Next” tab again. (Check the screenshot below)
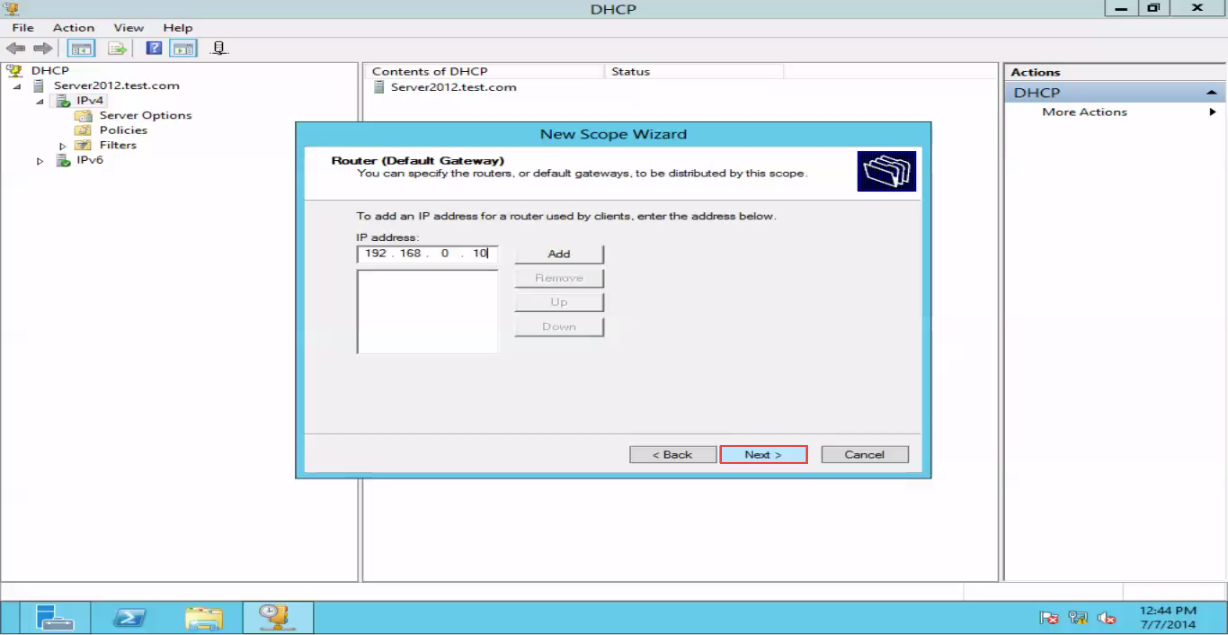
Step 10: Enter the Router IP Address. (Check the screenshot below)
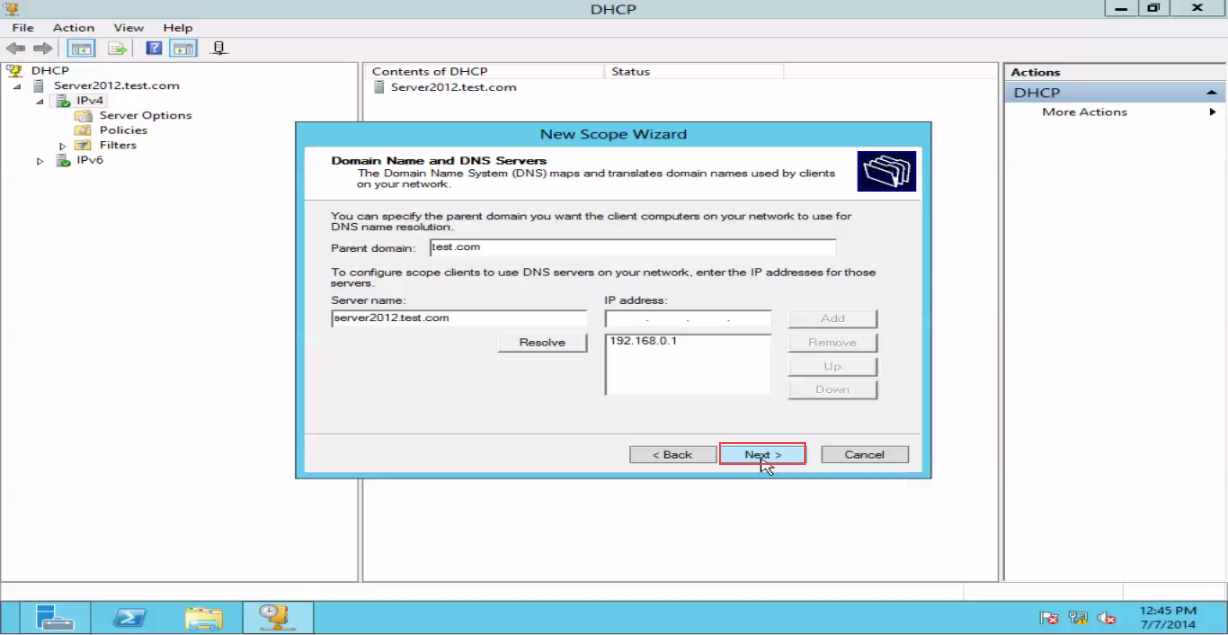
Step 11: Enter the Domain Name and click on “Resolve” button.
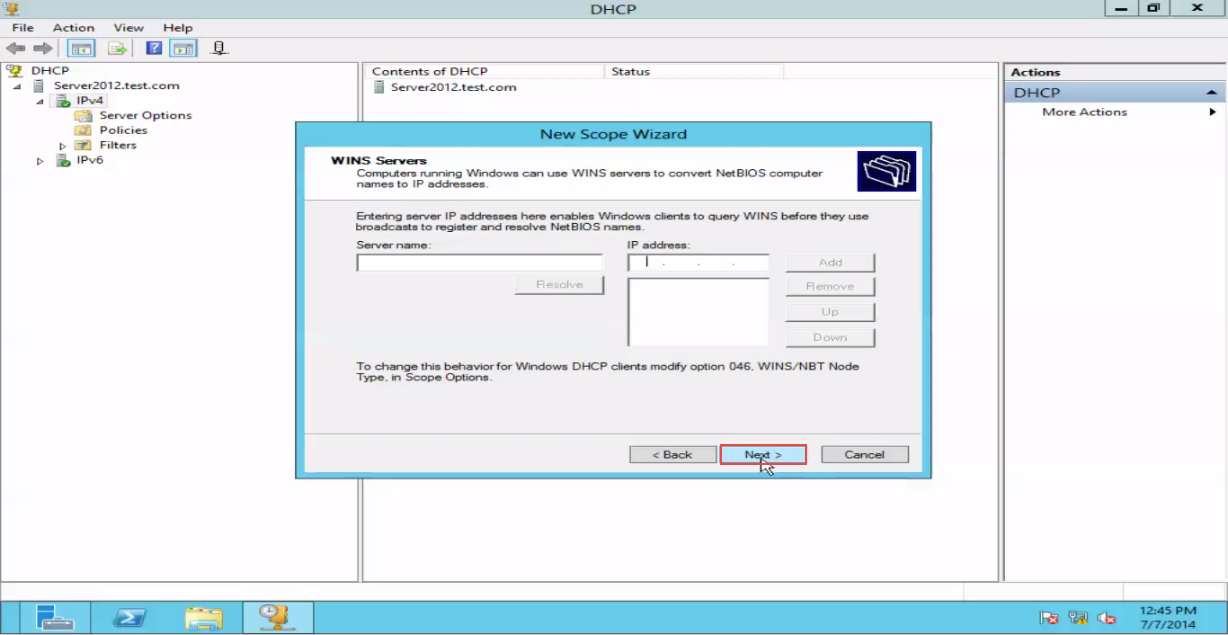
Step 12: Click on the “Next” button. (Check the screenshot below)
Step 13: Click on the “Next” button again.
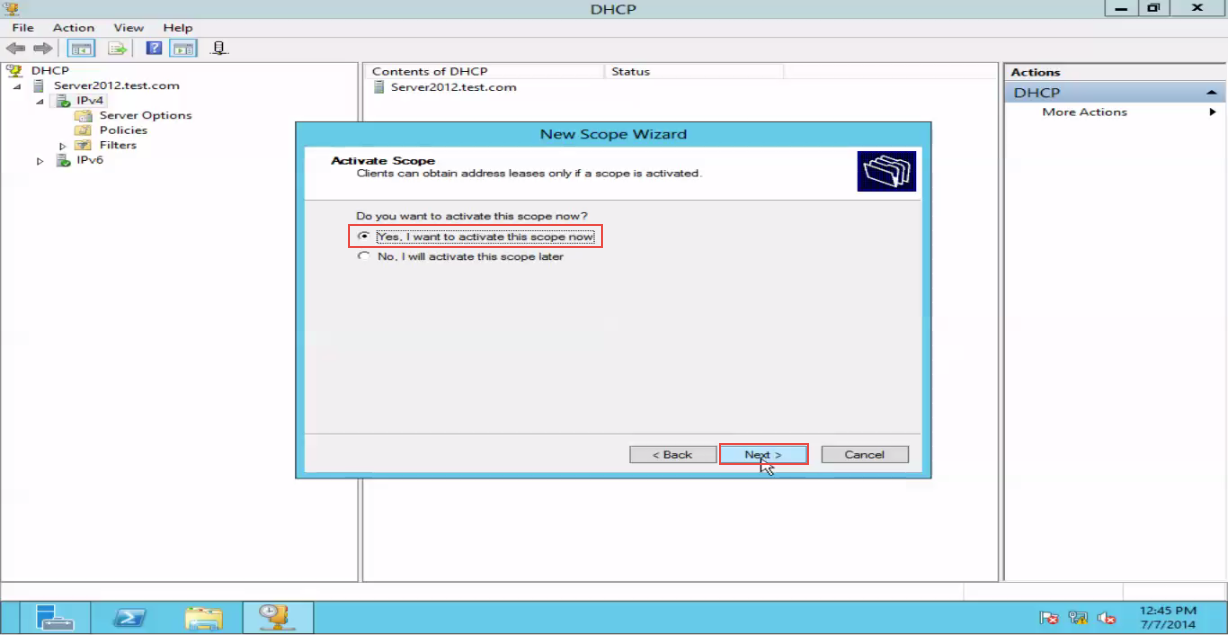
Step 14: Go to “Active Scope” and click on the “Next” button. (Check the screenshot below)
Step 15: Click on the “Finish” button to exit. (Check the screenshot below)

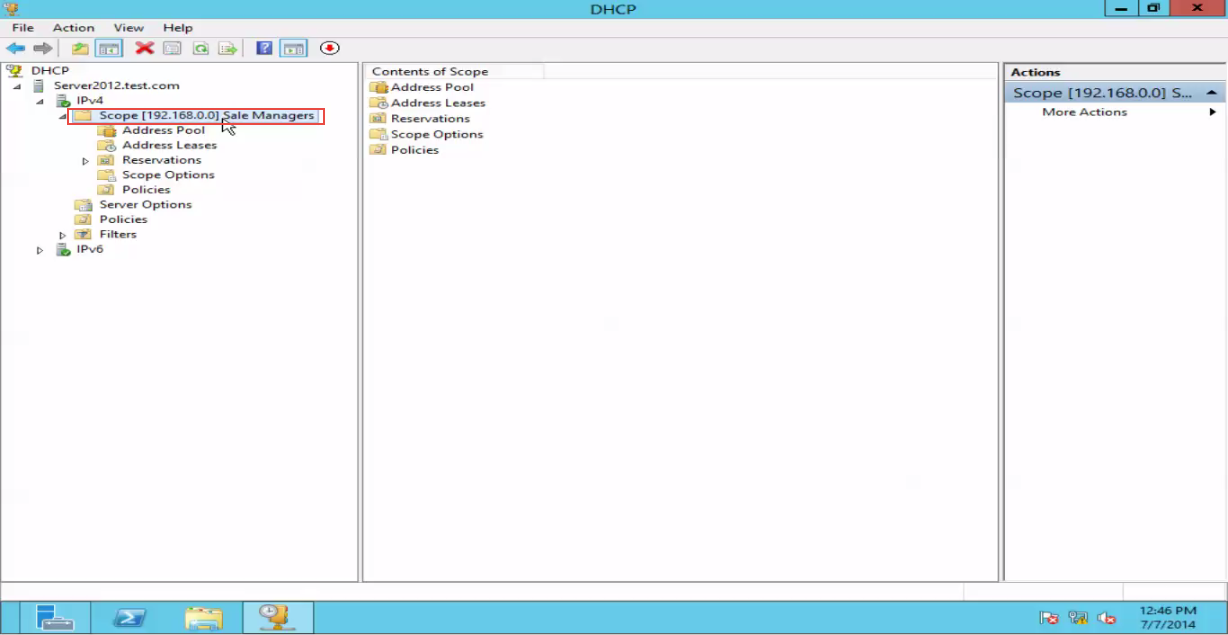
Step 16: Congratulations! You have successfully configured the new Scope in Server 2012. (Check the screenshot below)
Did you manage to create new scopes in Server 2012 by using the above guide?
Most IT support trainees who read this guide were able to do that.
In case you need some extra help, freel free to ask. You just have to drop a comment below.